

It’s no secret that the preferred way to install new end-user software in Nitrux is via AppBoxes and Flatpak. We prefer to keep root clean and free of surprises; in other words, we don’t make this distribution centered on a package manager, but on applications. We understand that some users still prefer a package manager but haven’t used a container before; Distrobox makes it easier to get started.
Admittedly, before marching down with torches in anger, let’s be clear: users can still use a package manager. In fact, users can use any package manager to install new software—just not directly to the root directory anymore; we can’t stress this enough.
In today’s tutorial, we’ll check a variety of different scenarios where Distrobox is useful.
Difficulty: ★★☆☆☆
📜 Table of Contents
- Containers are not Virtual Machines
- About Distrobox
- Managing Containers with Distrobox
- Accessing a Distrobox Container
- Adding a Volume to a Distrobox Container
- Managing Software inside a Distrobox Container
- Exporting Applications Installed on a Distrobox Container
- Enabling Hardware Acceleration for Applications on a Distrobox Container
- Using Aliases to run Software installed on a Distrobox Container from the Host
- Adding Executables from a Distrobox Container to the Host’s PATH
- Running Software from the Host using Libraries from a Distrobox Container
- Adding a Volume to a Distrobox Container
- About Rootful Containers in Distrobox
- Troubleshooting
Containers are not Virtual Machines
We understand that containers are a new concept for many people, and we’ve observed that they’re often mistaken for virtual machines; however, they’re very different. Containers and virtual machines (VMs) both create isolated environments for running applications, but they differ significantly in architecture and use cases; here’s an overview.
- Hypervisor: VMs run on a hypervisor, which can be Type 1 (bare-metal, such as VMware ESXi) or Type 2 (hosted, such as VirtualBox).
- Guest OS: Each VM includes an entire operating system (guest OS) with virtualized hardware resources (CPU, memory, storage).
- VMs are generally more resource-intensive because each VM runs an entire OS instance, which requires more CPU, memory, and storage.
- Isolation: VMs provide strong isolation because each VM runs independently, with its own OS and resources.
- It suits scenarios that require strong isolation, such as running different OSes on the same physical hardware.
- Performance: VMs incur higher overhead because of the extra virtualization layer and the need to run a full OS, resulting in slower performance than containers. Hypervisor overhead can also increase resource consumption.
- Container Engine: Containers run on a container engine (e.g., Docker or Podman) that uses the host OS kernel.
- Shared OS: Containers share the host OS kernel but have isolated user spaces, so they don’t require a full OS instance per container.
- Containers are lightweight because they share the host OS kernel and do not require an entire OS instance, making them more efficient with resources
- Containers can start up quickly and use less memory and storage than VMs.
- Isolation: Containers provide process-level isolation using namespaces and control groups (cgroups).
- Containers are great for developing, testing, and deploying applications in a consistent environment.
- Performance: Containers have lower overhead and can offer near-native performance as they share the host OS kernel.
🔰 Information: For a more in-depth analysis and comparison, see Virtualization and Containerization of Application Infrastructure: A Comparison by Thijs Scheepers (2014).
About Distrobox
Distrobox is based on an OCI image and implements concepts similar to ToolBox, built on Podman and OCI-standard container technologies. As the project describes, “Simply put, it’s a fancy wrapper around podman, docker, or lilipod to create and start containers highly integrated with the hosts.”
It has been written in POSIX shell to be as portable as possible and does not have issues with dependencies or with version compatibility of the GNU C Library (also known as glibc). It also aims to enter the container as quickly as possible; if you use the container as your default terminal environment, every millisecond counts.
Here are some of the highlights of Distrobox.
- Provide a mutable environment on an immutable OS, such as Endless OS, Fedora Silverblue, OpenSUSE MicroOS, or SteamOS 3.
- Provide a locally privileged environment for sudoless setups (e.g., company-provided laptops, security reasons, etc.)
- To mix and match a stable base system (e.g., Debian Stable, Ubuntu LTS, Red Hat) with a bleeding-edge environment for development or gaming (e.g., Arch, OpenSUSE Tumbleweed, or Fedora with the latest Mesa).
- Leverage large, curated distro images for Docker/Podman to manage multiple environments.
Managing Containers with Distrobox
Before using Distrobox, we must change the root propagation to “shared.”
- 🔰 Information: Mount propagation allows for sharing volumes mounted by a container to other containers in the same pod or pods on the same node.
We can check this value by running the following command.
findmnt -o PROPAGATION /
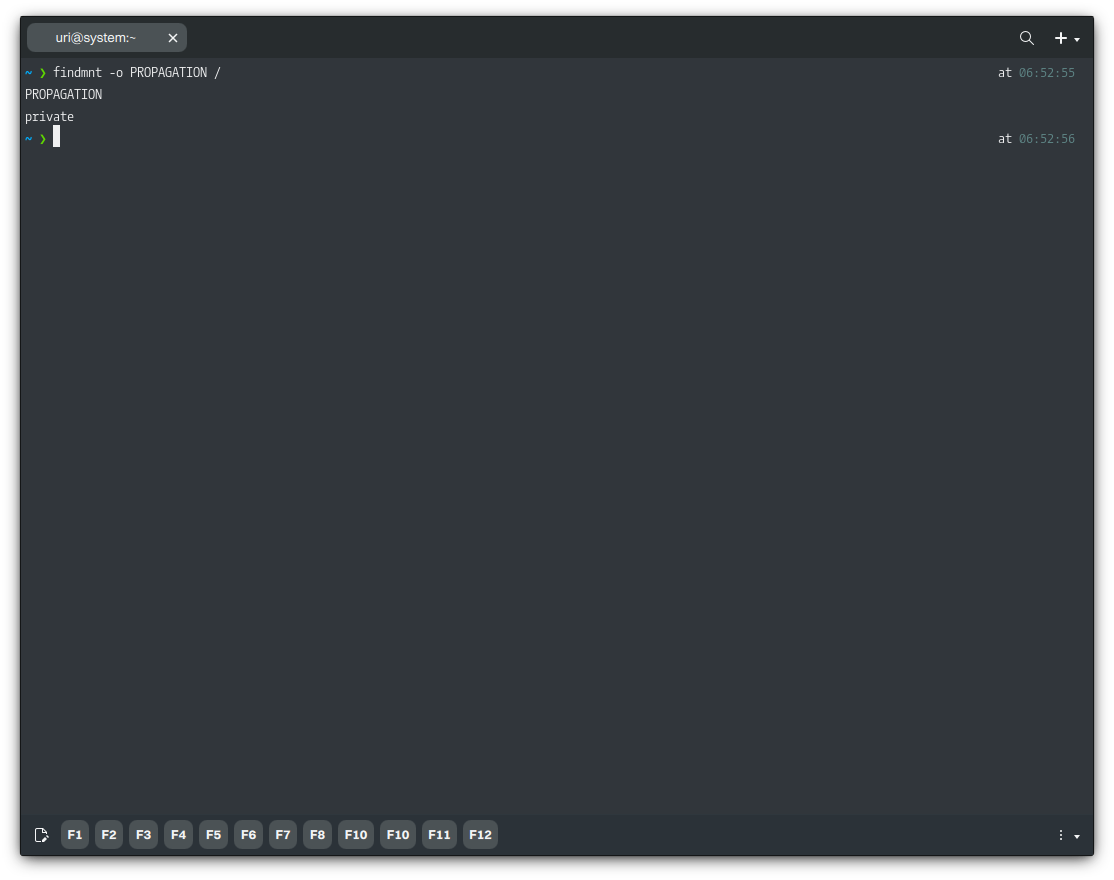
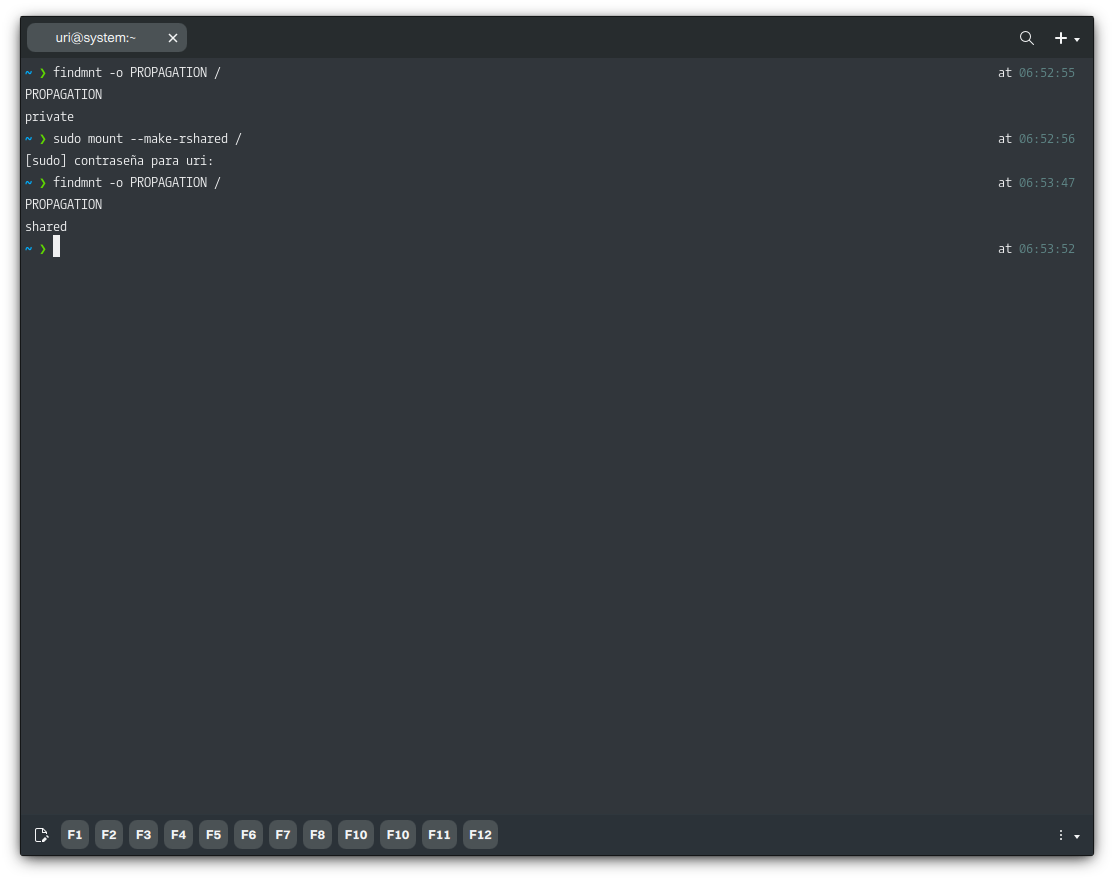
If the output reads “private,” we cannot enter the container. To change this value, run the following command.
sudo mount --make-rshared /
The syntax to create a new container is as follows.
distrobox create -n CONTAINER-NAME -i OS-NAME:VERSION
- 🔰 Information: To display a complete list of available containers for Distrobox, run the following command.
man distrobox-compatibility
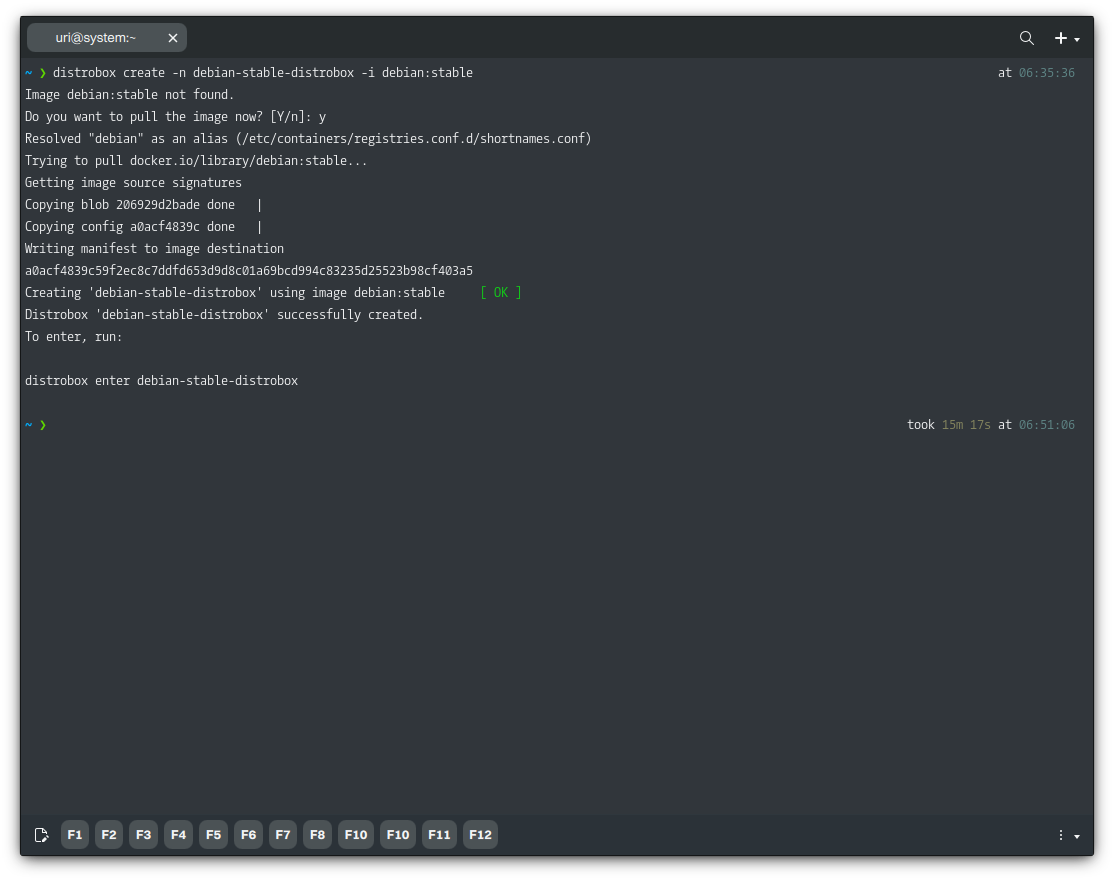
In this example, we’ll create a container using a Debian 12 (at the time of writing) image for familiarity’s sake. For simplicity, we won’t use the other features available in Distrobox when creating a container.
- 🔰 Information: The command below pulls the official Debian 12 image from Docker Hub and creates a container called “debian-stable-distrobox.”
distrobox create -n debian-stable-distrobox -i debian:stable
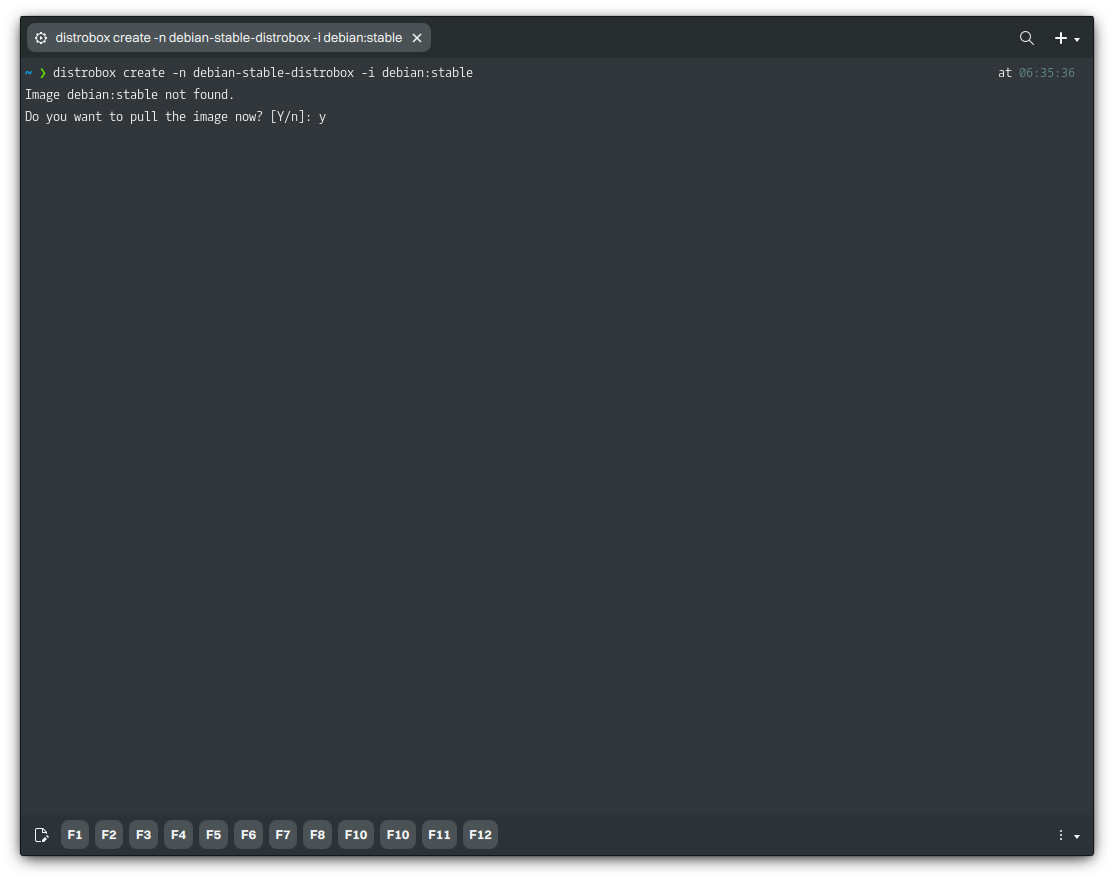
We accept downloading this container image.
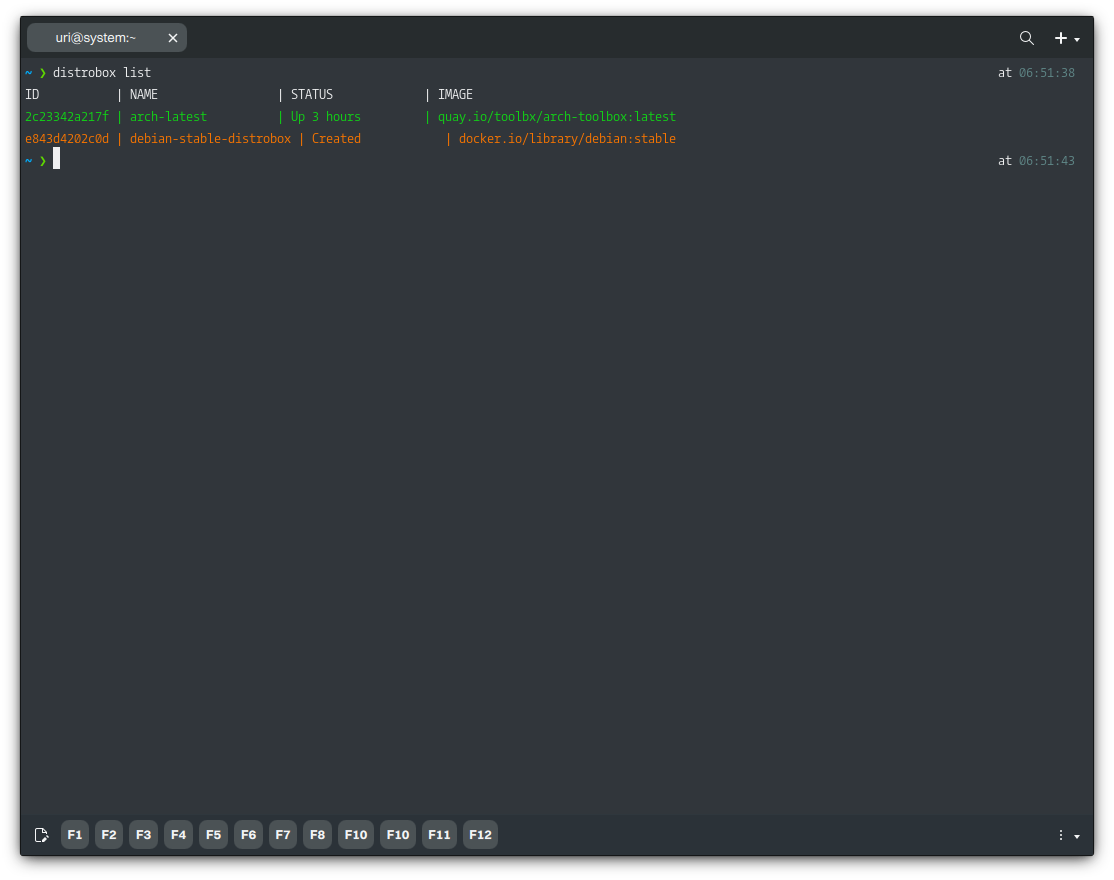
To list containers created with Distrobox, run the following command.
distrobox list
Lastly, to remove a container, we must stop it first. Once they’re stopped, we can remove the containers.
- 🔰 Information: If the Distrobox commands don’t work, use Podman directly; see Forcefully Stopping all Containers and Forcefully Removing all Containers.
distrobox stop CONTAINER-NAME
distrobox rm CONTAINER-NAME
Finally, to delete the unused container image, follow these steps: First, list the container images; each image will have an ID. Then, delete the image using the ID.
- 🔰 Information: Distrobox doesn’t have a specific command to do this, so we must use Podman directly.
podman images
podman rmi CONTAINER-IMAGE-ID
Accessing a Distrobox Container
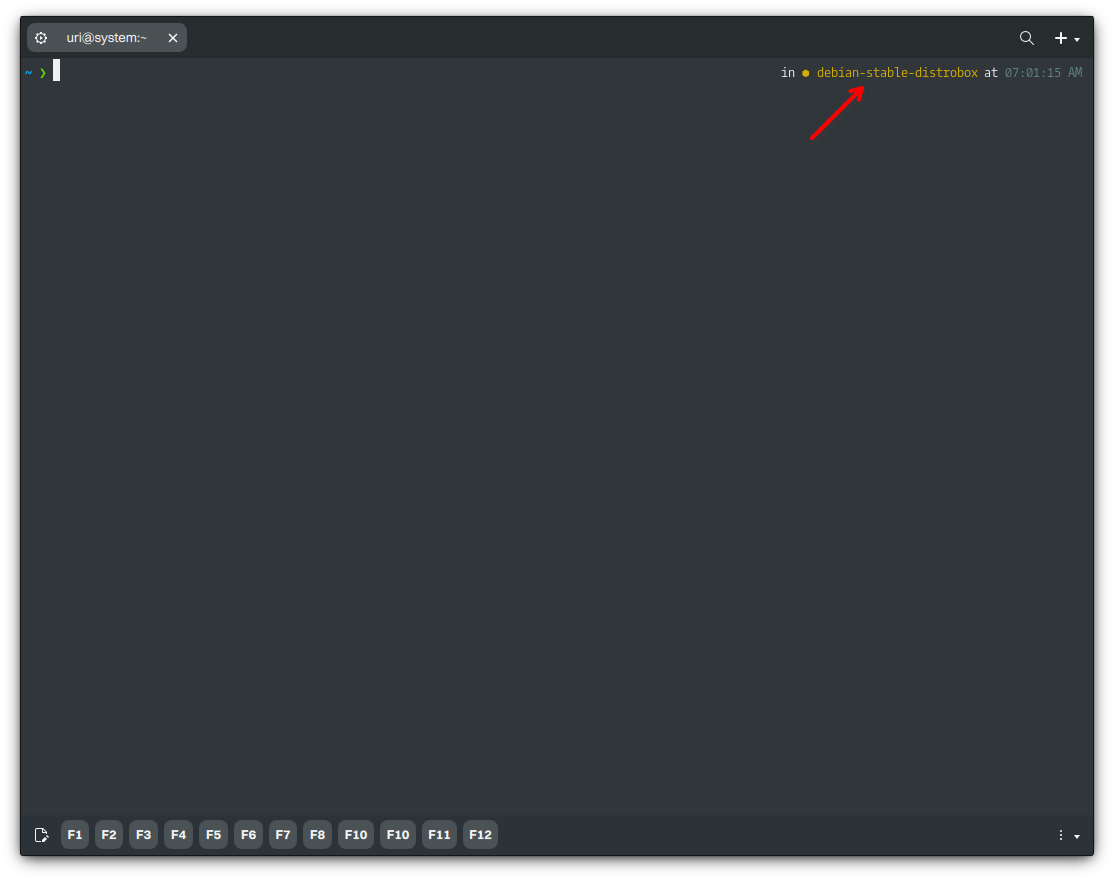
To access the newly created container, run the following command. Distrobox will do a basic setup, and as mentioned before, you can add additional features, including packages, environment variables, drivers (NVIDIA), and even an init.
distrobox enter -n debian-stable-distrobox
- 🔰 Information: Notice that the hostname in the terminal has changed to that of the container. We can continue using the container or type “exit” to quit it.
- ⚠️ Important: Since Distrobox version 1.4.0, the login shell of the container is the same as the default user shell. To change the shell in the container, use the command
chsh
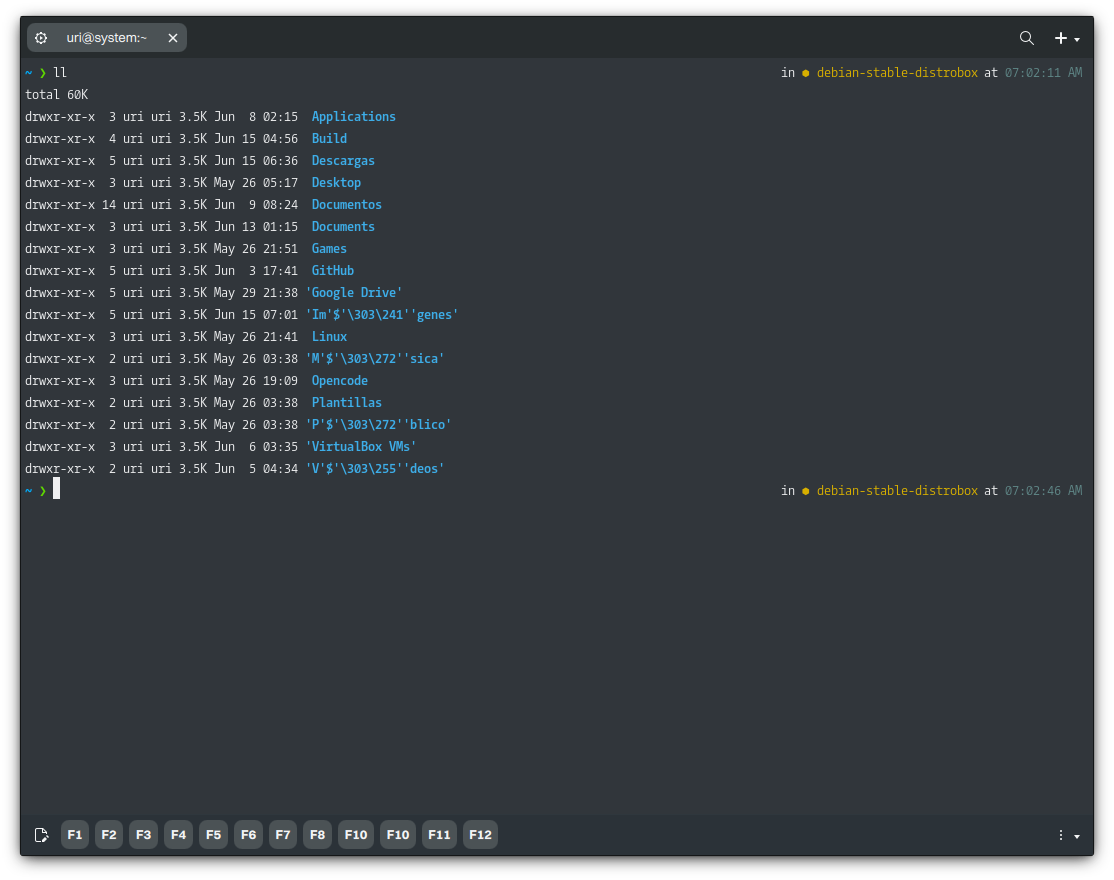
Even inside the container, we can browse our home directory (and any directory our user can access). However, we can’t browse the host’s root directory because we’re browsing the container’s root.
Adding a Volume to a Distrobox Container
Distrobox provides seamless integration between your containerized environment and the host system. One essential feature is the ability to mount additional volumes, allowing you to share specific directories between the Host and the container.
- ⚠️ Important: Distrobox only supports adding a volume when creating the container using the
--volumeflag indistrobox create. There is no built-in command in Distrobox to add a volume to an existing container dynamically
The –volume flag follows the same syntax as Docker and Podman:
distrobox create -n debian-stable-distrobox -i debian:stable --volume /host/path:/container/path
For example, if you want to share a directory, such as /opt/shared-data, between the host and the container at /mnt/shared-data inside the container, use:
distrobox create -n debian-stable-distrobox -i debian:stable --volume /opt/shared-data:/mnt/shared-data
After entering the container, you can access /mnt/shared-data:
distrobox enter debian-stable-distrobox -- ls -l /mnt/shared-data
If you only want the container to have read access to a directory, append “:ro”.
distrobox create -n debian-stable-distrobox -i debian:stable --volume /etc:/mnt/etc:ro
So, files inside the container (/mnt/etc) cannot be modified.
Managing Software inside a Distrobox Container
With Distrobox, you don’t need to enter the container to manage software; you can run commands directly from the host. The syntax is as follows.
distrobox enter -n CONTAINER-NAME -- COMMAND
For example, we can update the package index and install software just as we would in a conventional distribution, such as Debian. It’s important to note that actions that require elevated privileges use sudo.
distrobox enter -n debian-stable-distrobox -- sudo apt update
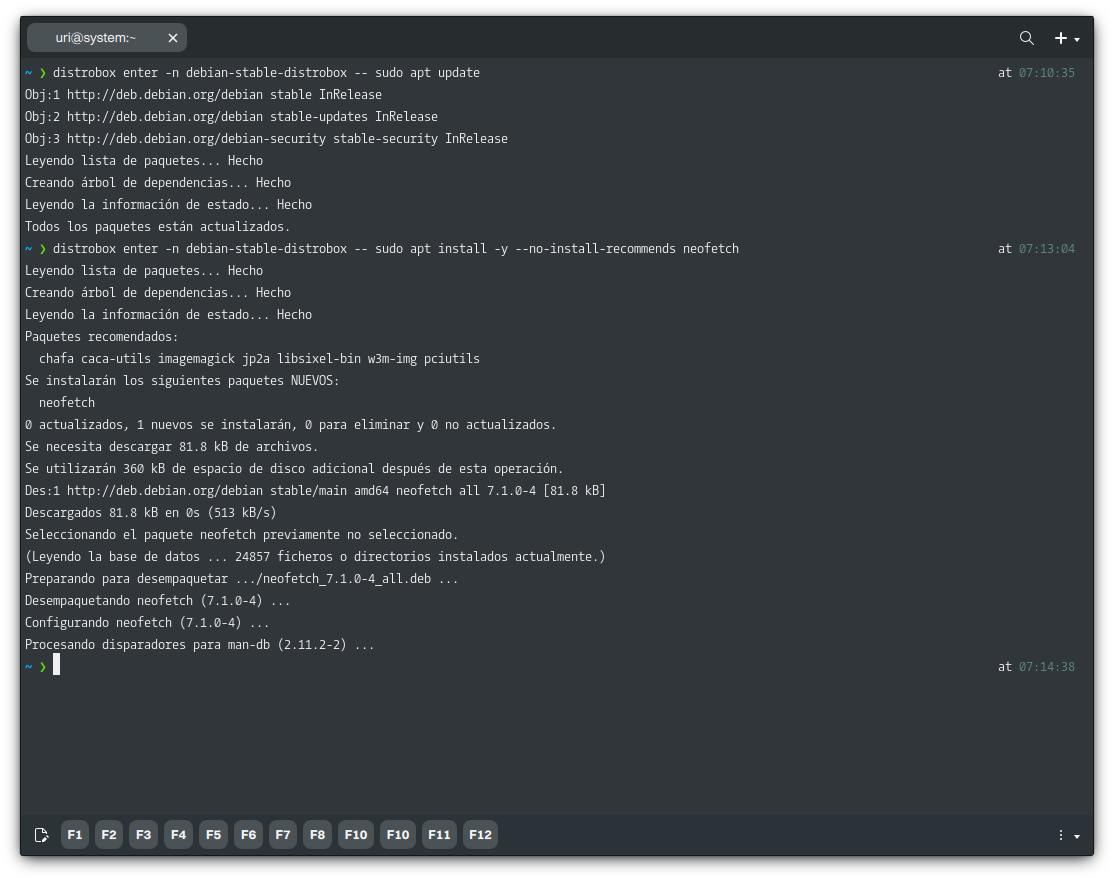
After installing our software, we can run it the same way; let’s do that with Neofetch.
distrobox enter -n debian-stable-distrobox -- neofetch
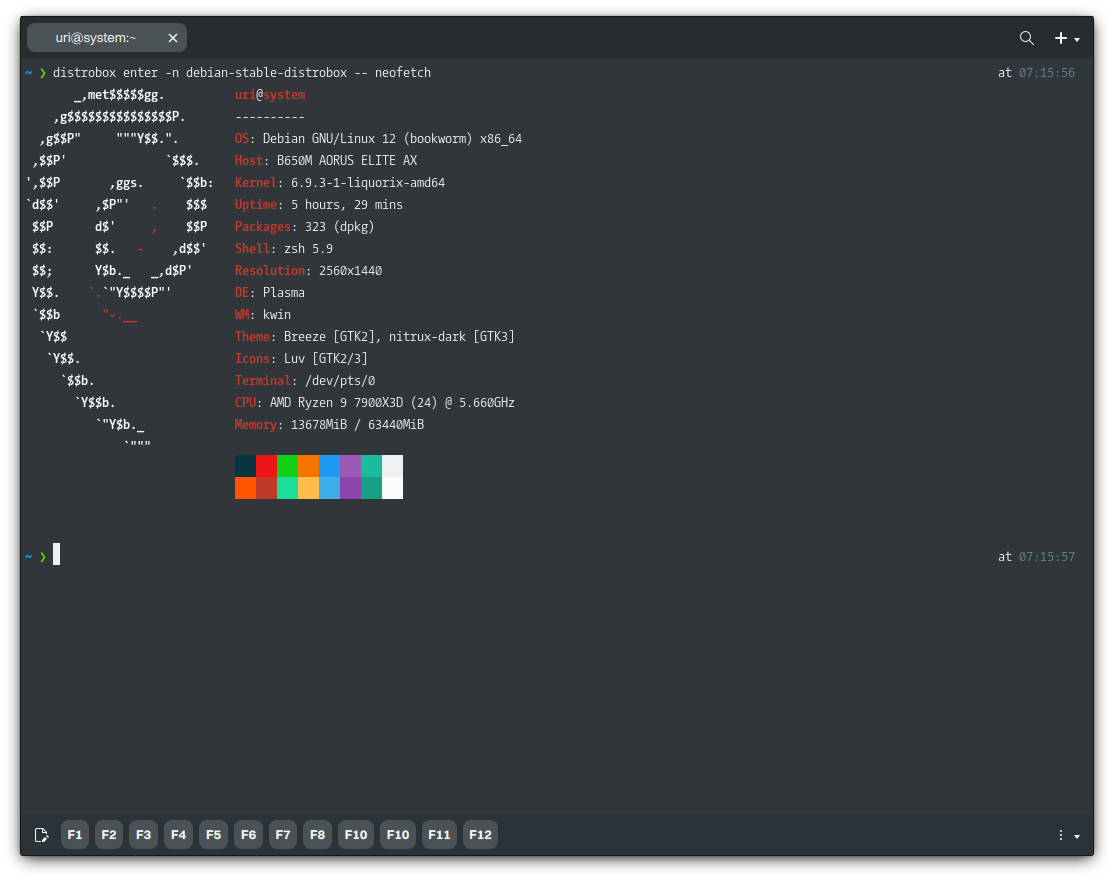
Likewise, we can remove software from the container. Let’s remove Neofetch without entering the container.
distrobox enter -n debian-stable-distrobox -- sudo apt remove -y neofetch
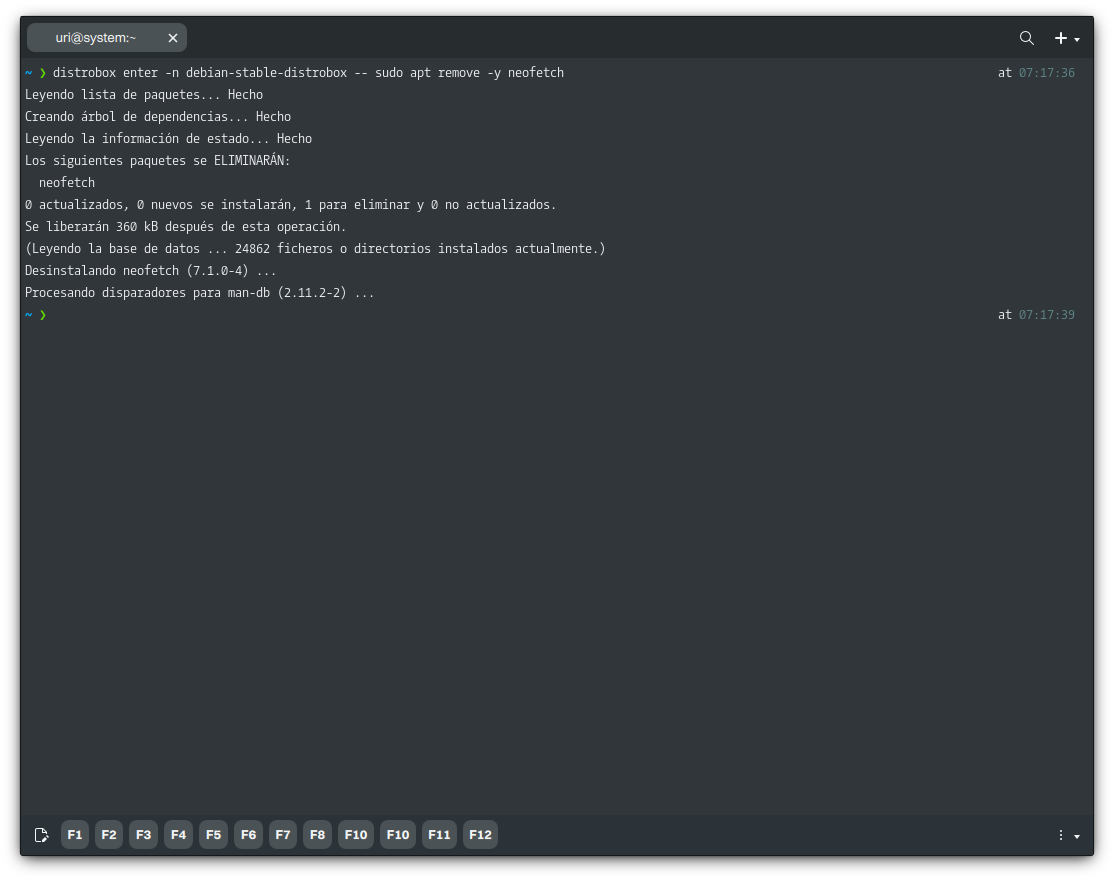
Of course, any other APT/dpkg command will work, such as upgrade, autoremove, etc.
Exporting Applications Installed on a Distrobox Container
We can export the Software we’ve installed in a Distrobox container. Exporting a program with Distrobox makes the specified Software available to the host operating system as a native application and integrates it into the applications launcher.
We must enter the container to export an application, since we can’t do so from the host. Once inside, we can run the following command.
distrobox-export --app APPLICATION-EXECUTABLE
- ⚠️ Important: The “export” option only works when the software uses a desktop launcher (.desktop). Create an alias in the host’s shell configuration file for software that doesn’t use a desktop launcher (as most CLI-only utilities and tools do).
In this example, we will install and export Blender so it is available on the Host. As we did before, we can install software without entering the container.
distrobox enter -n debian-stable-distrobox -- sudo apt install -y --no-install-recommends blender
Then we ran Blender to verify it worked.
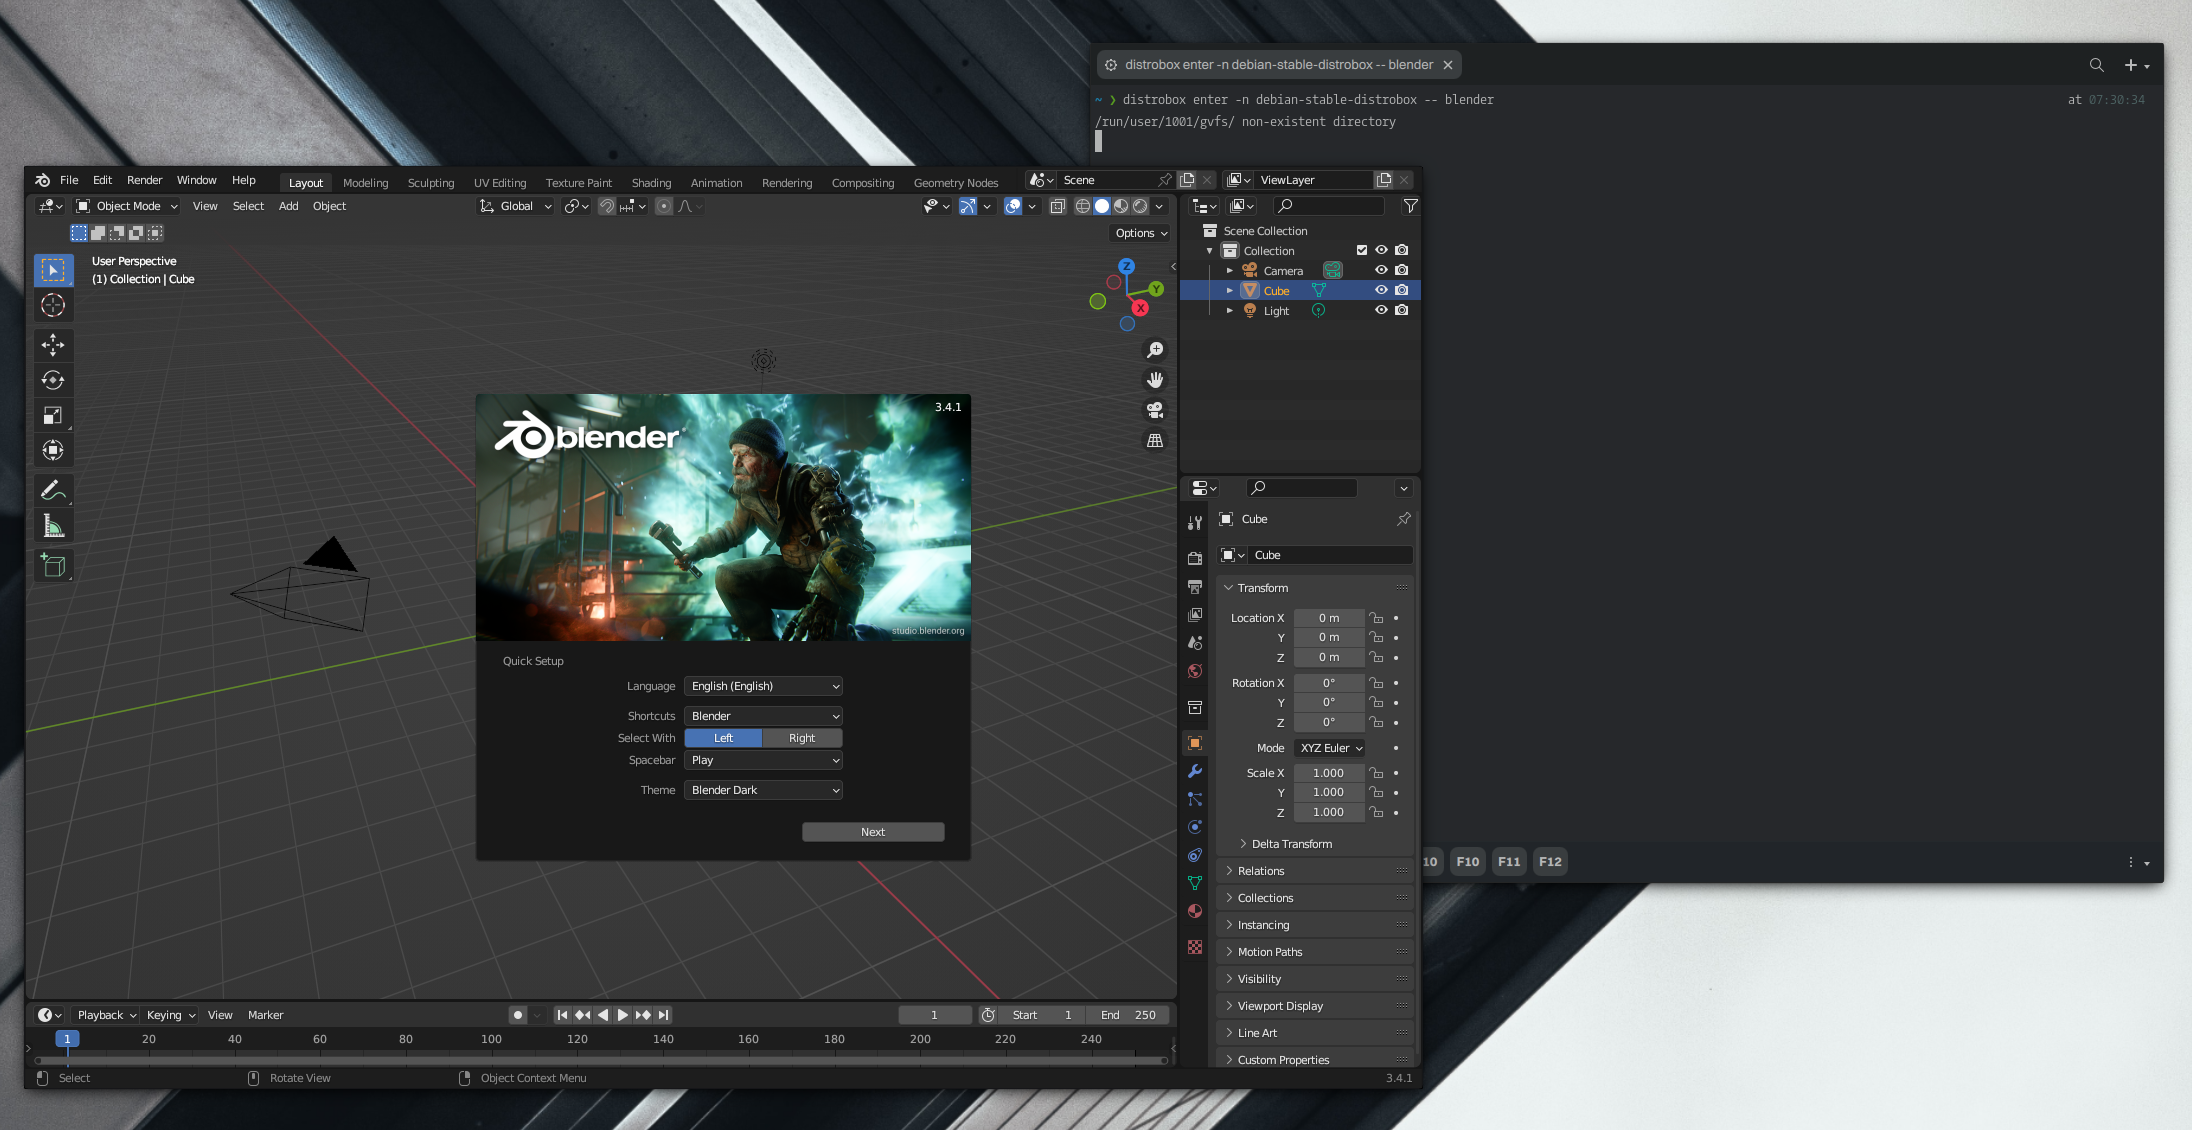
Great, Blender works as expected. We can now export the application.
- 🔰 Information: When exporting the application, we must use the application’s executable; this way, Distrobox will know the associated desktop launcher. Distrobox will create the desktop launcher in the directory
$HOME/.local/share/applications.
distrobox-export -a blender
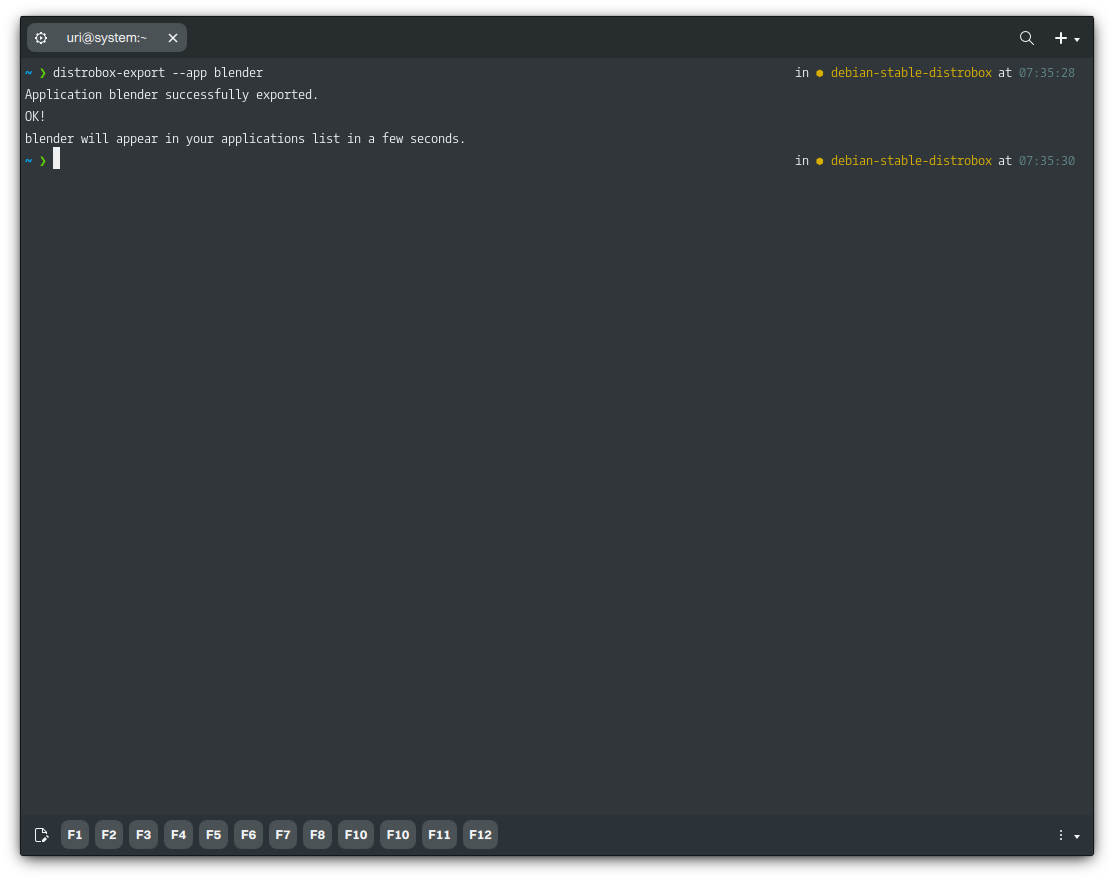
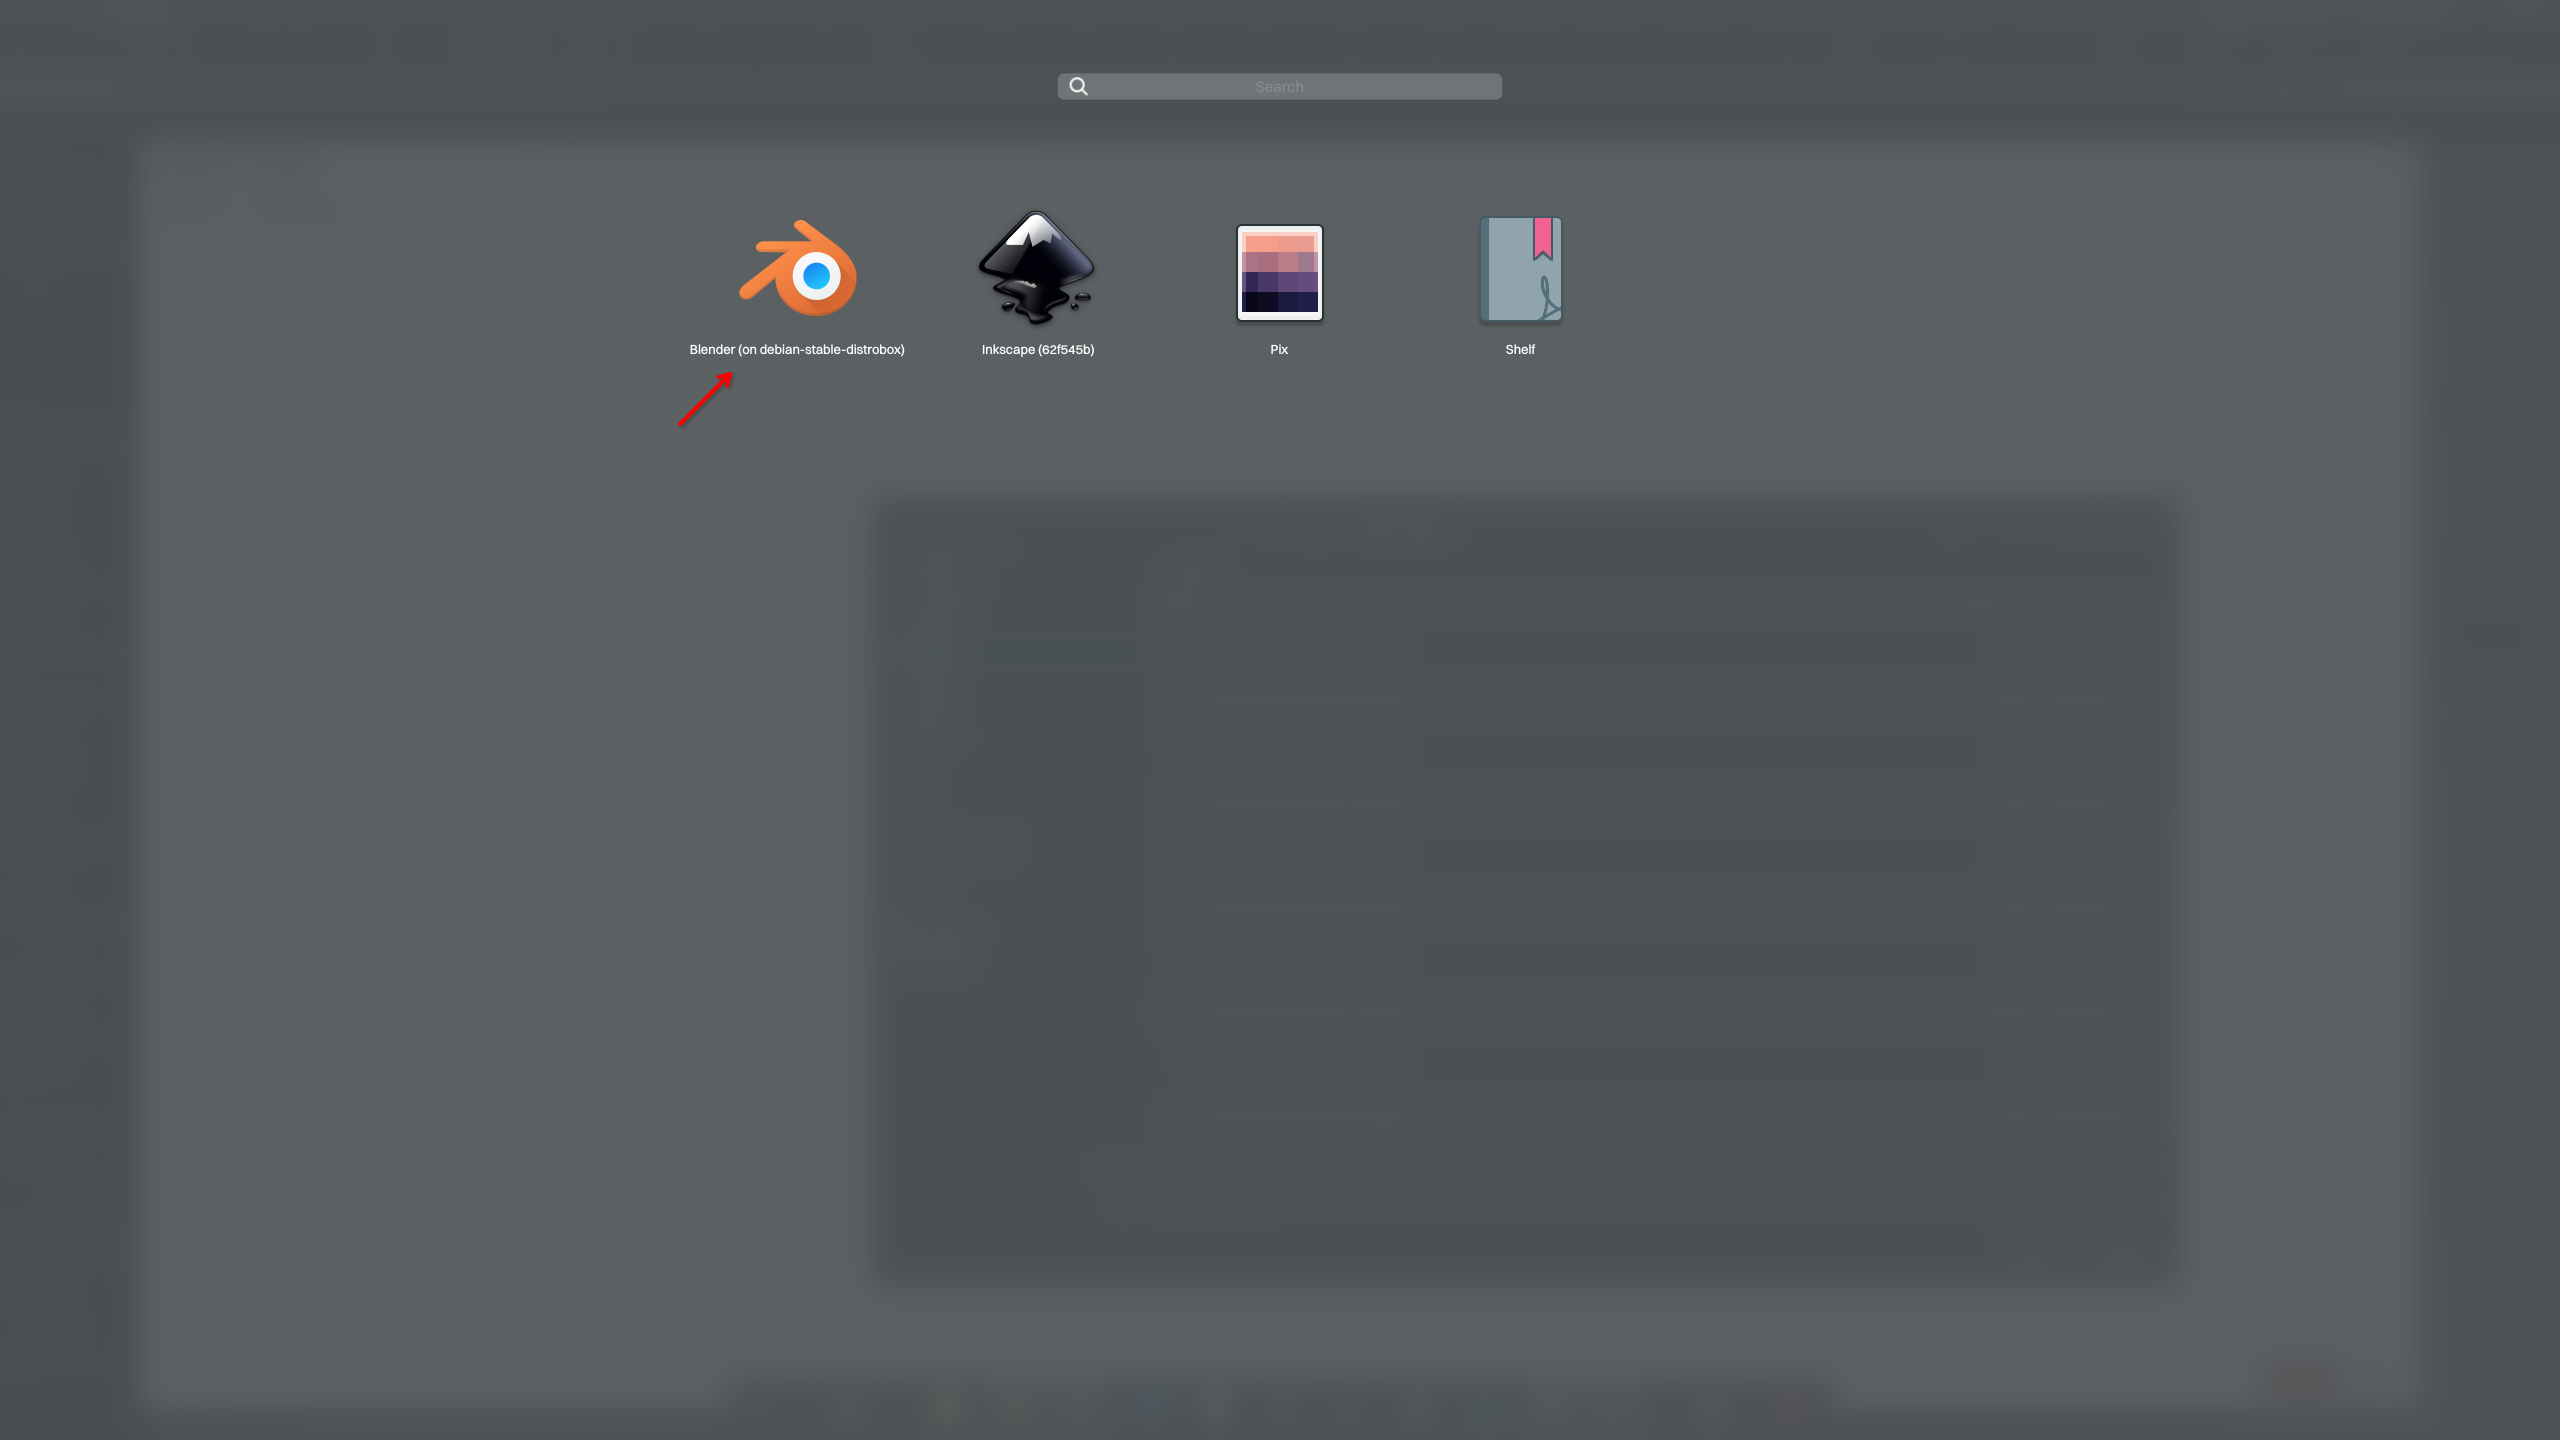
After that, Blender will appear in our application menu. The exported application launcher includes the container name, which helps organize applications and makes it easier to remove them when you no longer need them.
Likewise, to delete an exported application, run the following command.
distrobox-export -a blender -d
Enabling Hardware Acceleration for Applications on a Distrobox Container
Follow the steps below to run applications installed in a Distrobox container that require hardware acceleration, such as Blender. These steps might not be necessary for all software, especially if it doesn’t require hardware acceleration.
⚠️ Important: Instructions below are for the container used as an example for this tutorial and using Nitrux as the host; adapt to your needs if you’re using a different container.
- MESA drivers (radeon, amdgpu, i945, etc.). If the container doesn’t already have them, install only the following packages.
distrobox enter -n debian-stable-distrobox -- sudo apt install -y --no-install-recommends libegl1-mesa libgl1-mesa-glx libvulkan1 mesa-vulkan-drivers
Using Aliases to run Software installed on a Distrobox Container from the Host
As we’ve seen, running software from Distrobox is super easy, but what if you don’t want to type all that every time you run something? We can solve that quickly by creating an alias in the shell configuration file ($HOME/.zshrc). We can create an alias for anything we want; for example, if we only want to type apt and not the full Distrobox command, distrobox enter -n debian-stable-distrobox -- sudo apt we can create one. To do this, run the following command.
- ⚠️ Important: Please note the trailing space in our alias. The space lets the alias take our input. Otherwise, it would simply run the command
aptas-is.
echo -e "\n# Alias for APT\nalias apt='distrobox enter -n debian-stable-distrobox -- sudo apt '\n" >> ~/.zshrc && source ~/.zshrc
After that, and after sourcing the file, our new alias works. You will also notice that after adding this alias, we do not have to prepend APT with sudo, for example, we’d only use apt update instead of sudo apt update because we already use it in the alias, and if we were to prepend sudo, we’d be running sudo distrobox-enter [...] -- sudo apt [...], which is not the objective, and Distrobox will not run with sudo printing the message Running distrobox-enter via SUDO/DOAS is not supported.
- ⚠️ Important: When entering the container, if the alias is still active and we type the command, this will inevitably loop into trying to run the container inside the container, which will not work. Remove the alias or use a different name before entering the container.
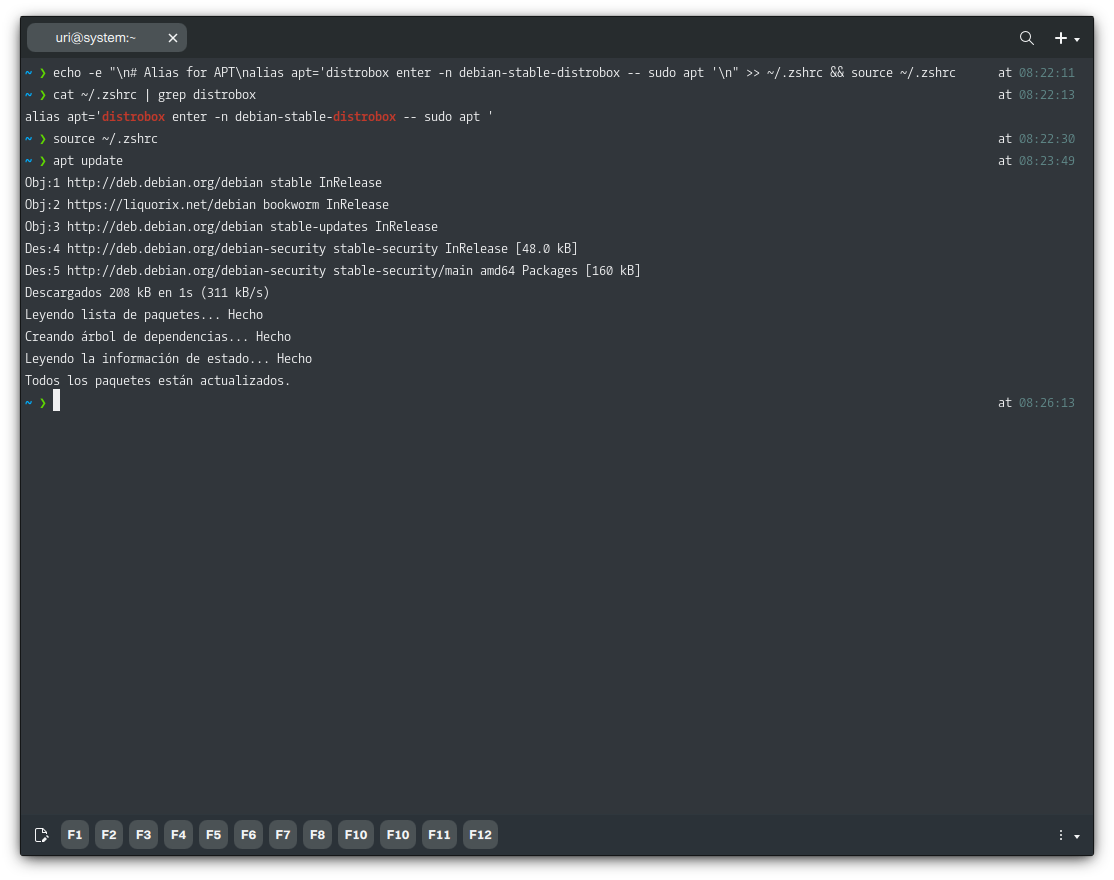
Of course, you can do this for any other software in any container you create.
Adding Executables from a Distrobox Container to the Host’s PATH
When you export an application with Distrobox, the container’s executable isn’t available in the Host’s PATH; only desktop launchers are available to launch the application from a menu or the terminal. While this makes graphical applications accessible from the GUI, command-line utilities often lack a desktop launcher, and the host has no integrated way to access them.
As we understand it, the Distrobox developer makes this decision to avoid conflicts with host executables.
However, the user may want a container executable available globally, even when no conflicts occur. We can work around this by adding a shell script that runs the container executable.
This approach differs from using aliases, as demonstrated in “Using Aliases to run Software installed on a Distrobox Container from the Host,” for the following reasons:
- The issue arises because aliases are recognized only by interactive shells, not by non-interactive processes such as those invoked by a process on the host.
- Aliases are shell-specific constructs that are active only within the interactive shell.
- Aliases cannot be exported to child processes, meaning external programs invoked from our shell won’t know about them.
To illustrate, we’ll install software called “yewtube,” a terminal-based YouTube player and downloader. We’ll use this software as a practical example since it requires MPV, and Nitrux does not include MPV.
First, we need to create a container to install MPV. Assuming we’re using a container similar to the one in this tutorial, we just install MPV.
distrobox enter -n deb-yewtube -- sudo apt install -y --no-install-recommends mpv
Then we install the software on the host. This YouTube player is available using the Python application manager, pipx, which we include in Nitrux.
pipx install git+https://github.com/mps-youtube/yewtube.git
pipx will install the executable in the home directory, specifically: ~/.local/bin/yt, like other software acquisition methods, such as Homebrew, pipx does not alter the root directory; it stores its content in the home directory. To add this directory to the PATH, run the following command.
- 🔰 Information: pipx will mention using “ensurepath,” but it will add the absolute path instead of the relative path.
echo -e '\n# Add ~/.local/bin to PATH\nexport PATH="$HOME/.local/bin:$PATH"' >> ~/.zshrc
source ~/.zshrc
If we run yewtube, it displays the following message, whether we use an alias or a shell function to make MPV available.
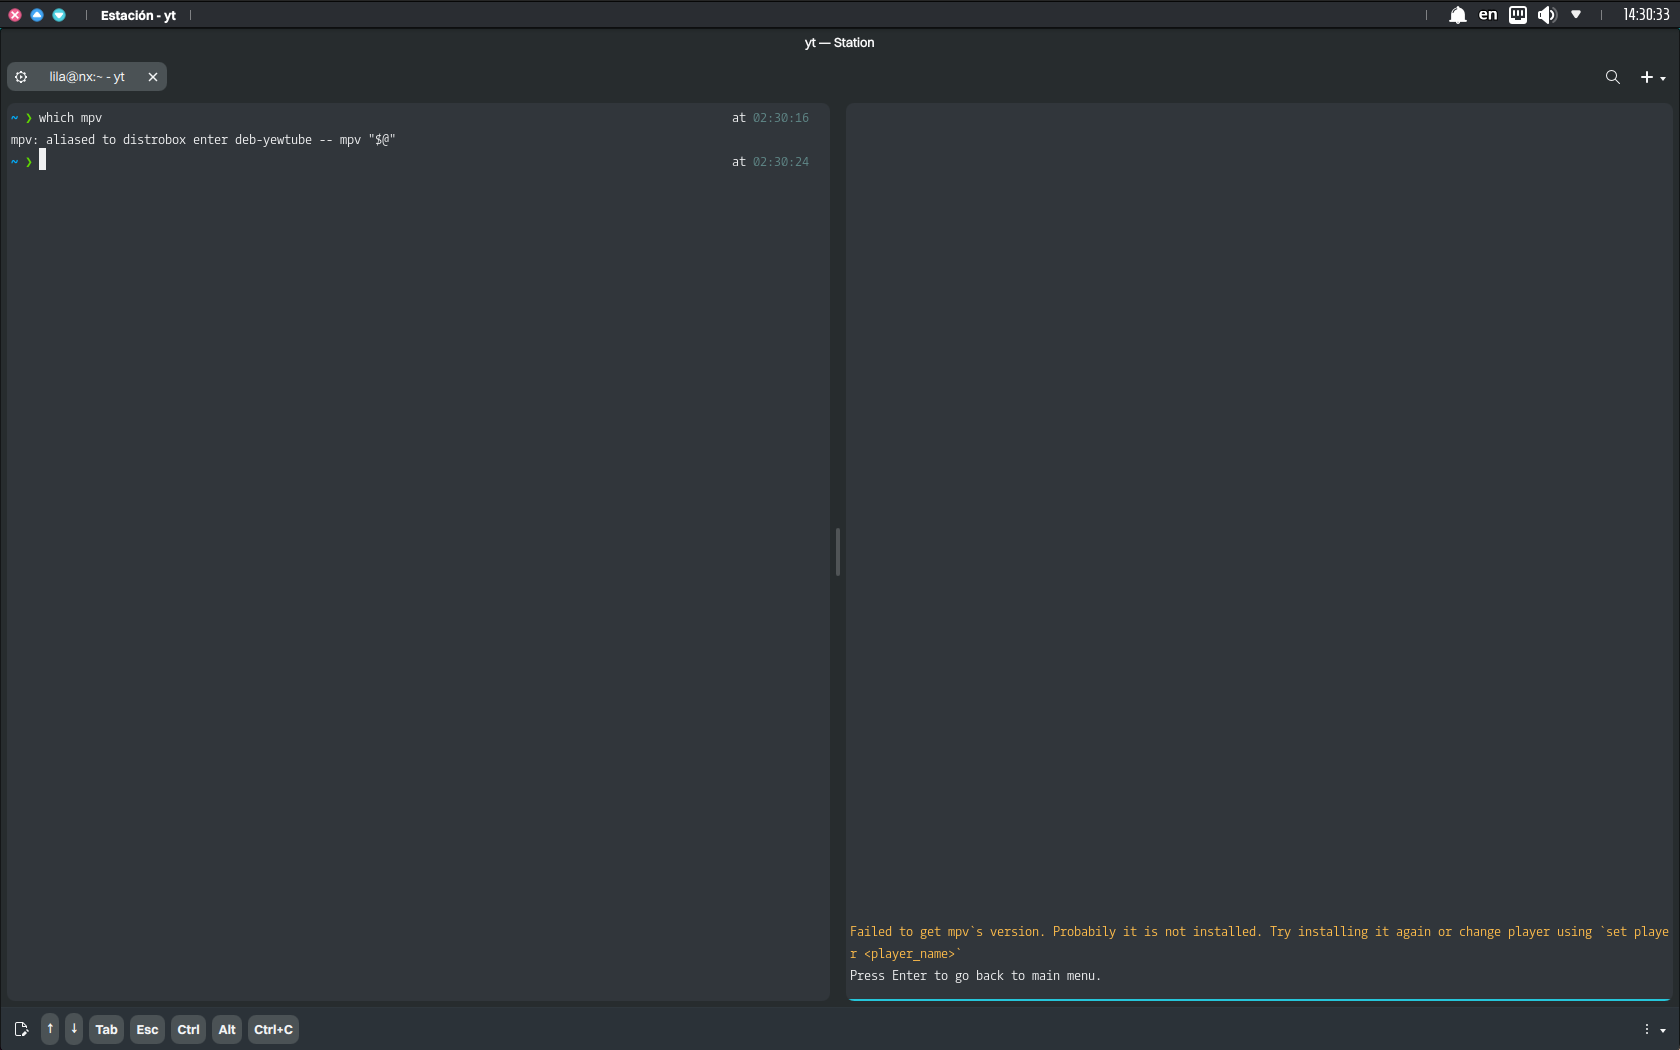
Shell functions, unlike aliases, can handle arguments properly (via “$@”) and are more versatile. Nonetheless, in this use case, shell functions are slightly less robust than scripts because they depend on sourcing the shell configuration.
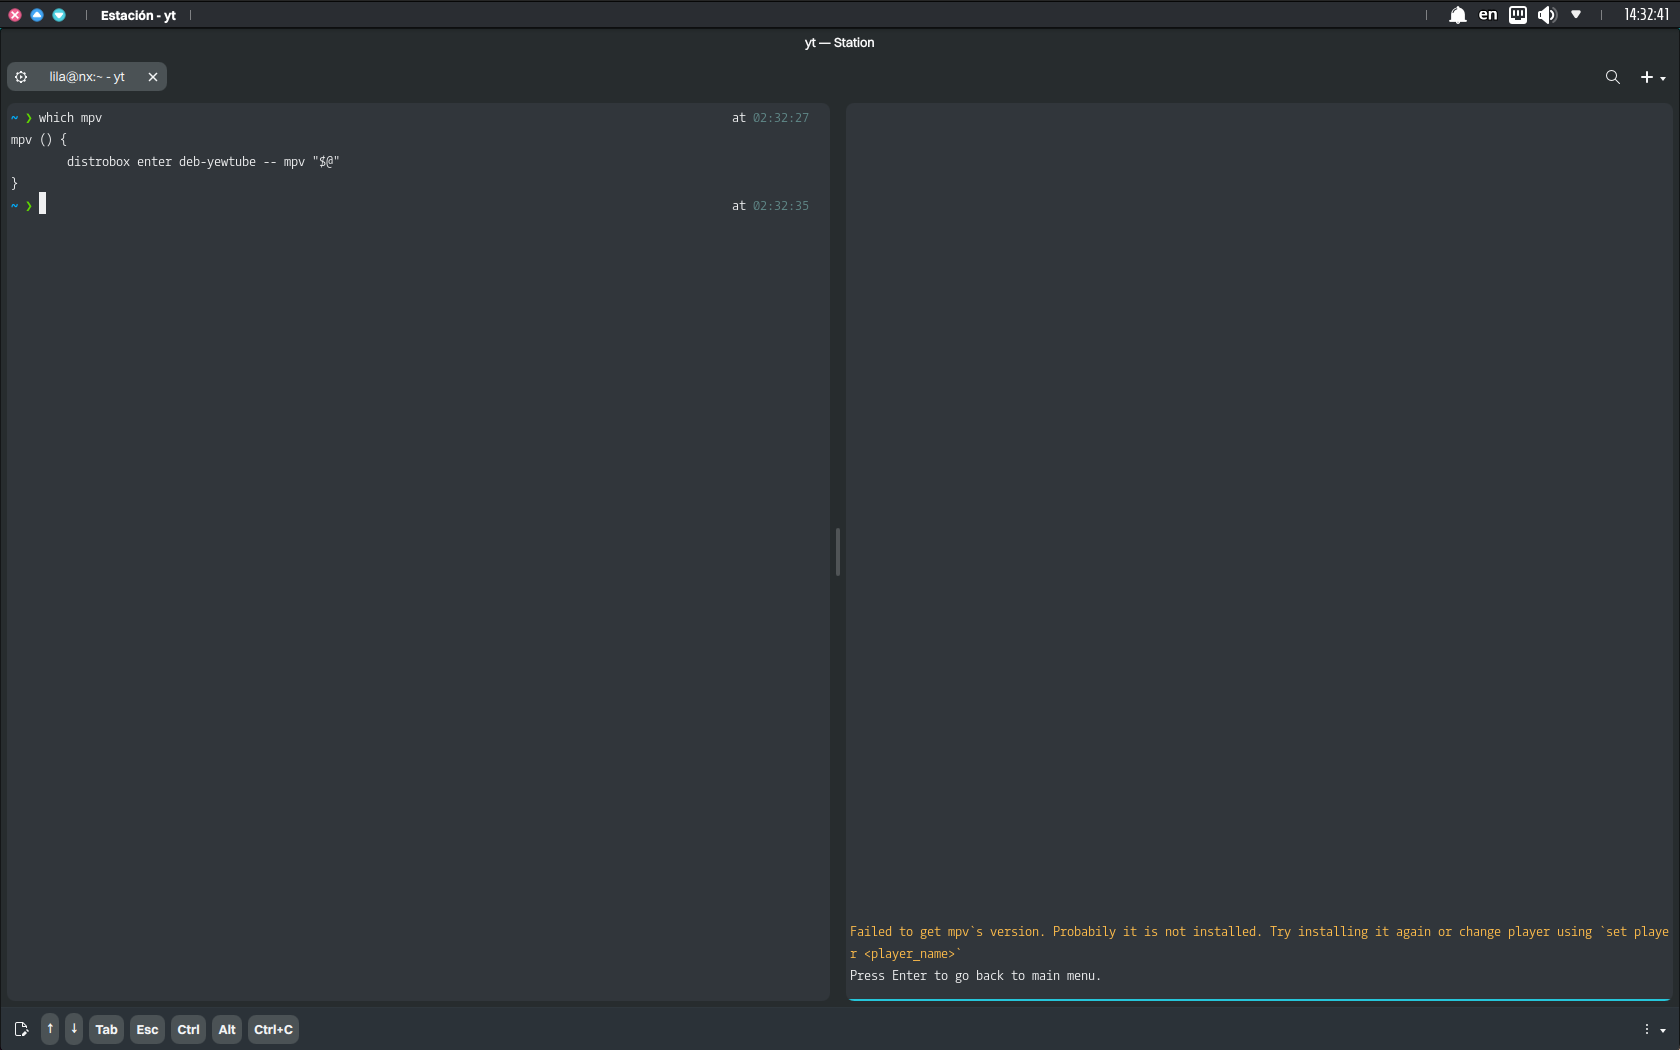
Thus, we create a shell script that runs as the executable on the host but resolves to the containerized executable. When we create a shell script and place it in a directory in the PATH, it becomes a standalone executable. Any process, whether an interactive shell, a background task, or a program like yewtube, can execute it by calling the binary or script directly.
echo '#!/bin/sh' > mpv && echo 'distrobox enter deb-yewtube -- mpv "$@"' >> mpv
chmod +x mpv
mv mpv ~/.local/bin
Now, we can use both yewtube and MPV, and yewtube can use its MPV backend.
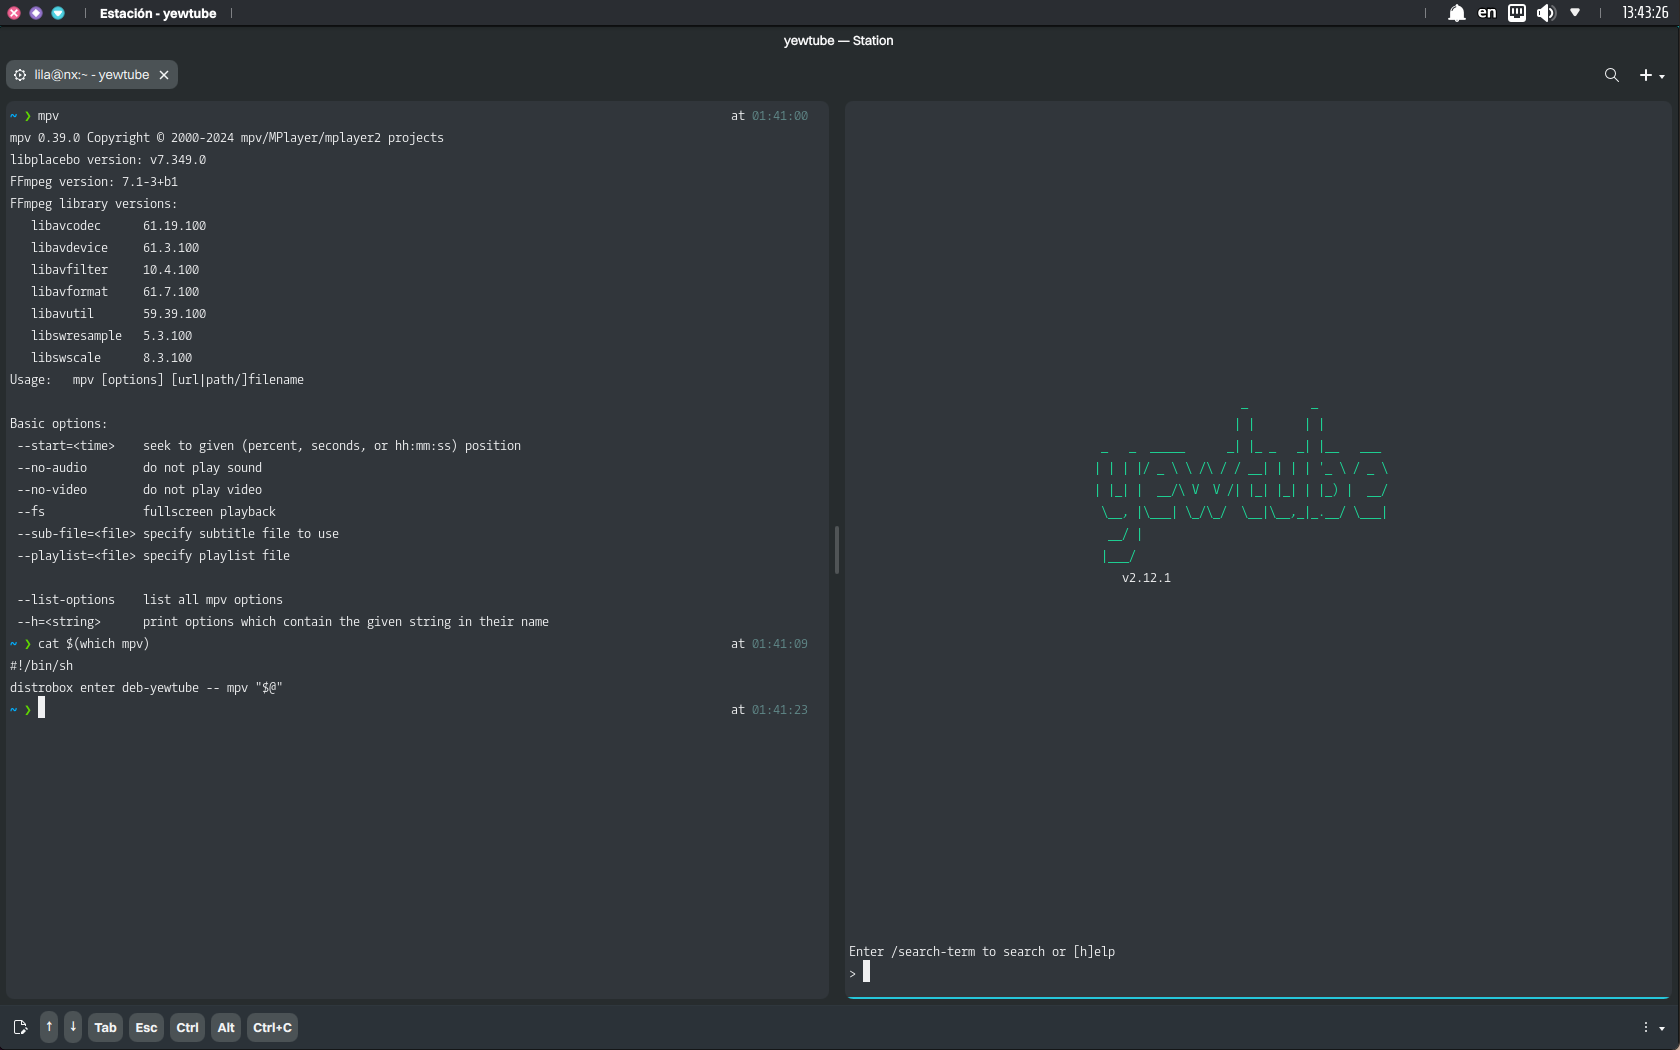
The script approach we implemented is generally the most robust because it works in all contexts (interactive and non-interactive).
Running Software from the Host using Libraries from a Distrobox Container
Aliases give us a lot of flexibility. An interesting use case is creating “runtimes.” We can create an alias named “dbox-run” to run any binaries on the host but use the libraries of the container instead of those available on the host, or as a shorthand to run the software we’ve installed on the container. For example, we can run Neofetch, a CLI utility without a desktop launcher, so Distrobox can’t export it by default.
First, we add the alias and source the shell configuration file. To do this, run the following command.
echo -e "\n# Alias for dbox-run\nalias dbox-run='distrobox enter -n debian-stable-distrobox --'\n" >> ~/.zshrc && source ~/.zshrc
We can now start using our new command.
dbox-run neofetch
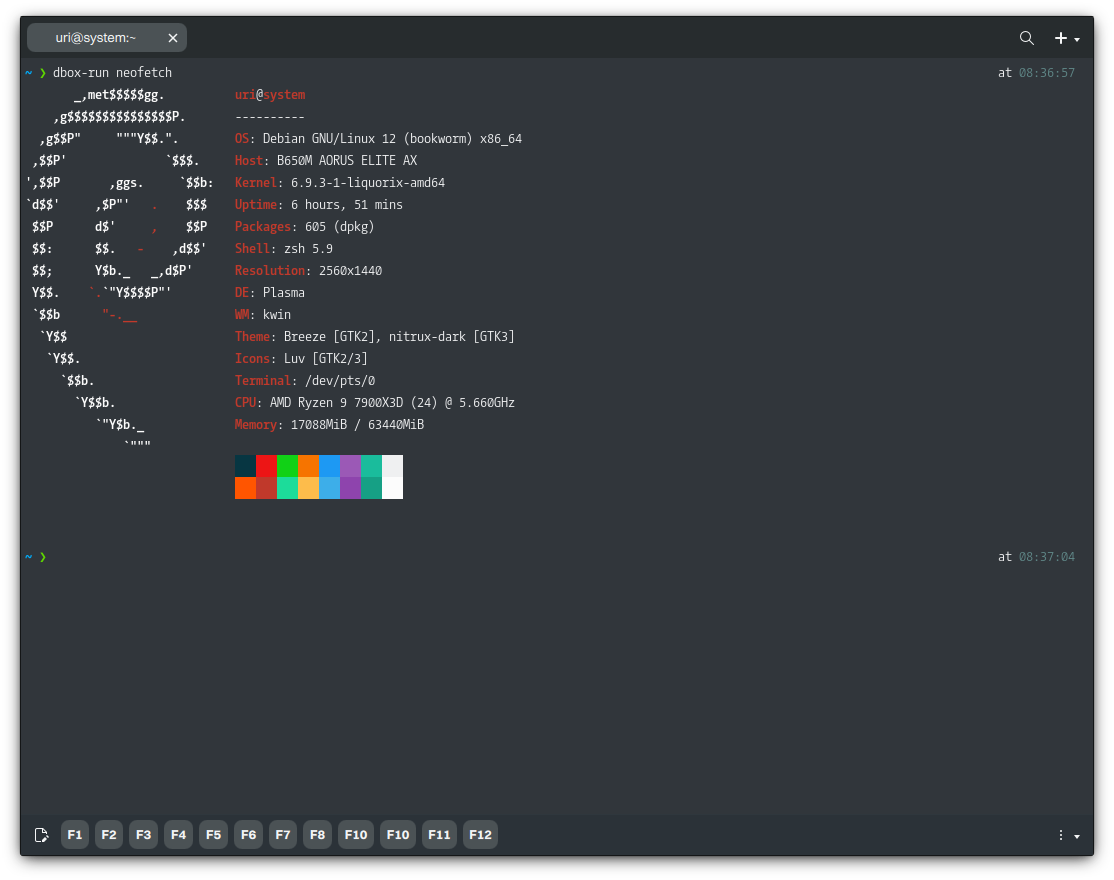
Alternatively, as mentioned, we can run binaries on the host, such as the Qt Creator binary (installed manually from the official site at https://www.qt.io/download). In this example, if we installed Qt Creator on the host and ran it, it couldn’t find the development headers and libraries it needs to compile projects.
# Running Qt Creator like this won't allow us to build projects

~/Qt/Tools/QtCreator/bin/qtcreator
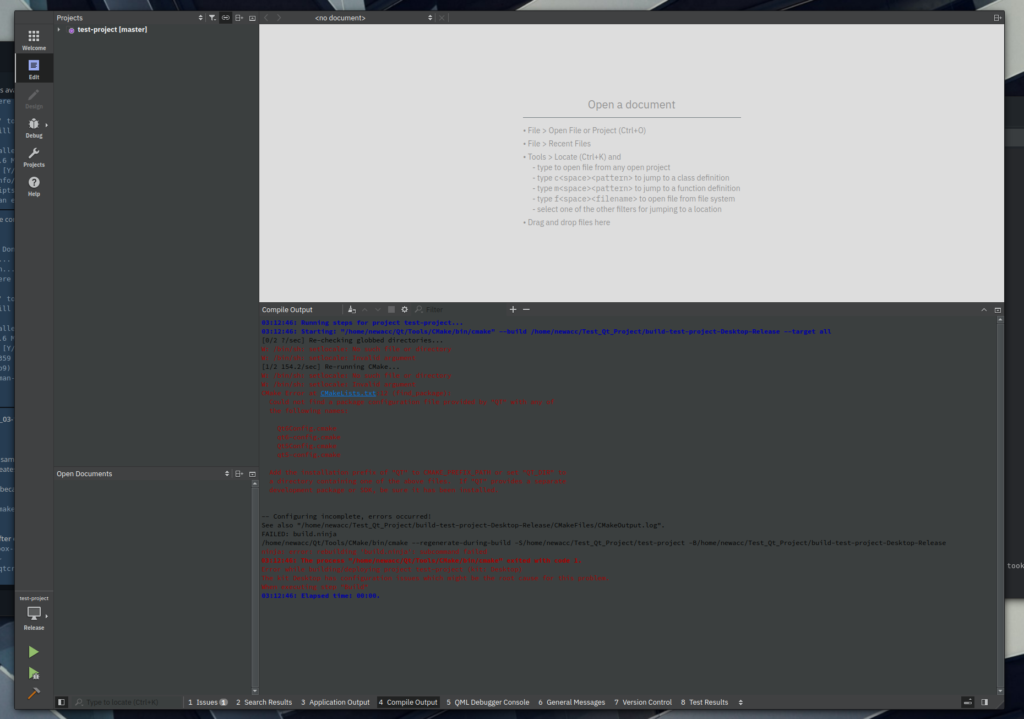
However, if we run the binary in a container with the required packages installed, it can build the projects.
#   Running Qt Creator like this will allow us to build projects (after installing the necessary packages on the container like qt5-default, qttools5-dev, cmake, and so on)

dbox-run ~/Qt/Tools/QtCreator/bin/qtcreator
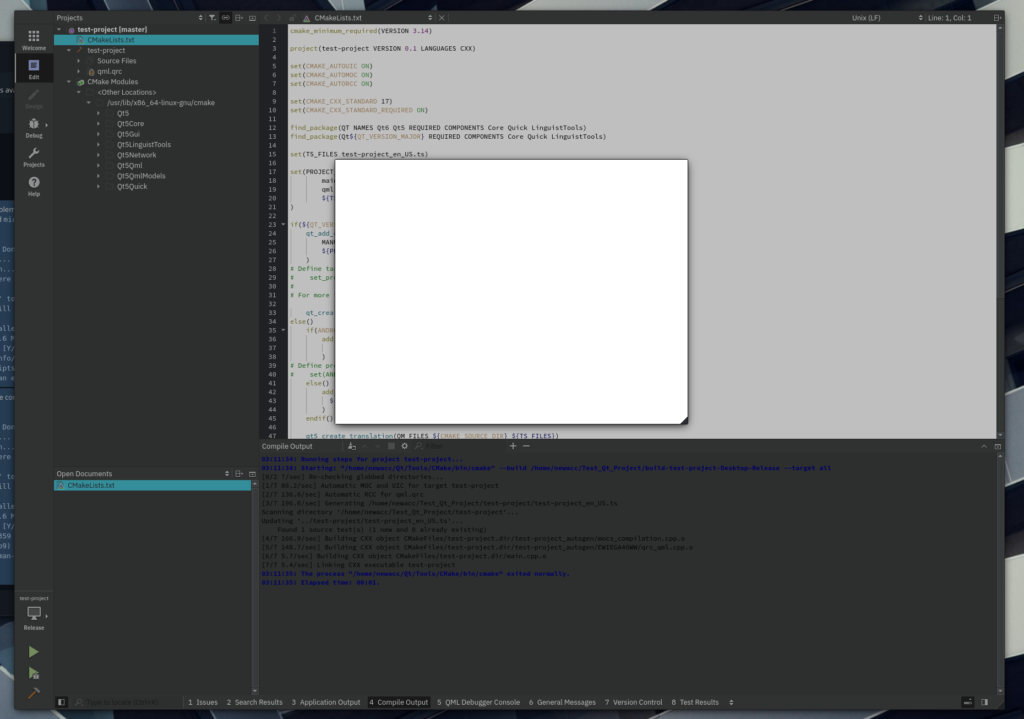
Another use case is running old binaries that do not work with newer libraries; for example, it would be the case of unmaintained AppImages built against older versions of the GNU C Library (or other libraries included in the AppImage) that do not work with the newer versions that we include in Nitrux (primarily because of deprecated/undefined symbols or functions in newer versions of such libraries).
- 🔰 Information: It’s worth remembering that while AppImages are self-contained, whatever libraries or binaries its creator did not include in the AppImage are going to load from the root directory of the distribution where the AppImage is running; problems will occur if these libraries and binaries are incompatible; typically, the application will crash with a segmentation fault, or in the case of the AppImage of the example below, an illegal hardware instruction.
For example, this Opera AppImage (available from AppImageHub) does not run in Nitrux; it shows an error.
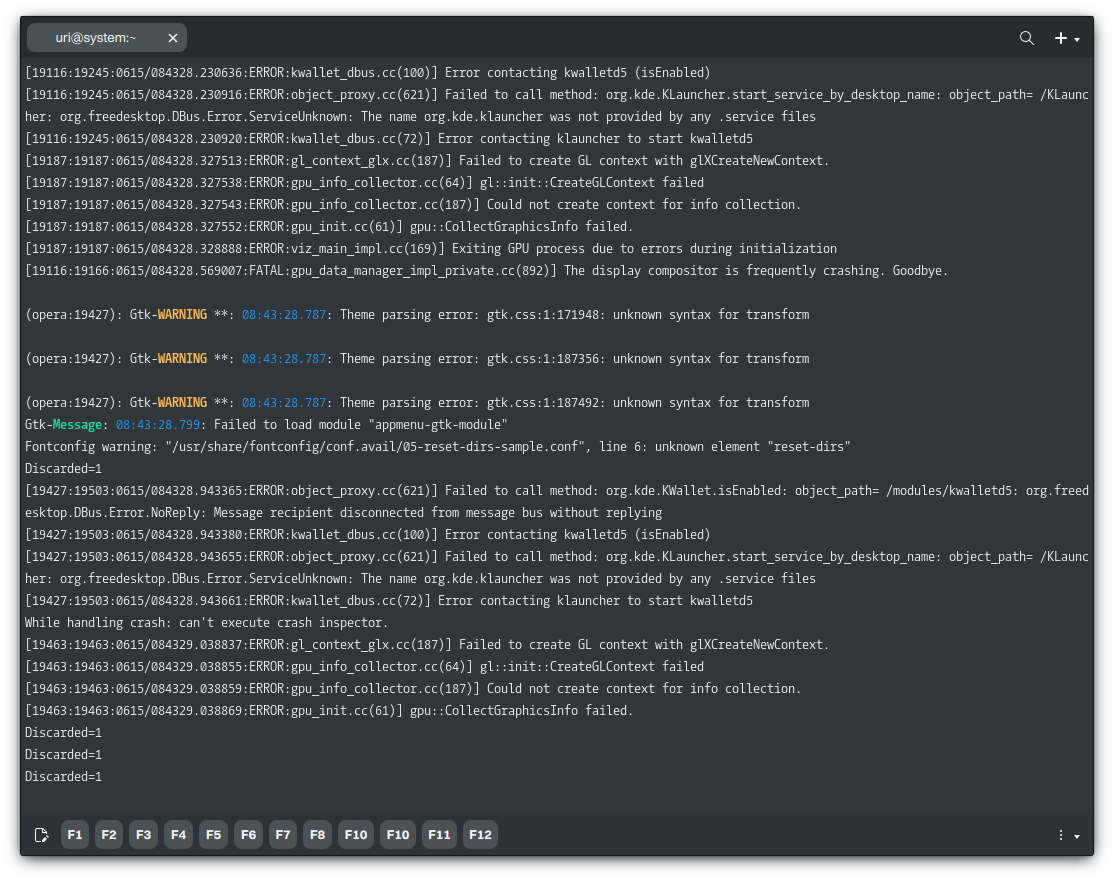
Let’s run this unmaintained AppImage using the container we created in this tutorial. It will work once we install the missing libraries in the container because the AppImage’s libraries and binaries use versions of libraries, such as the GNU C Library, that match those in the container. We use the container’s libraries instead of the newer libraries on the host system, Nitrux.
We could call this container a “runtime,” similar to a “runtime” for other packaging formats like Flatpak or Snaps. Users should install FUSE to run AppImages in a container.
- 🔰 Information: The packages below will allow us to run this particular AppImage using the container we created. We can use our aliases or the full command sequence; either works.
distrobox enter -n debian-stable-distrobox -- sudo apt install -y --no-install-recommends libfuse2 fuse3 libxtst6 libatk-bridge2.0-0 libgtk-3-0
Then, run the AppImage; let’s assume it’s in our Downloads directory.
dbox-run ~/Descargas/Opera-x86_64.AppImage
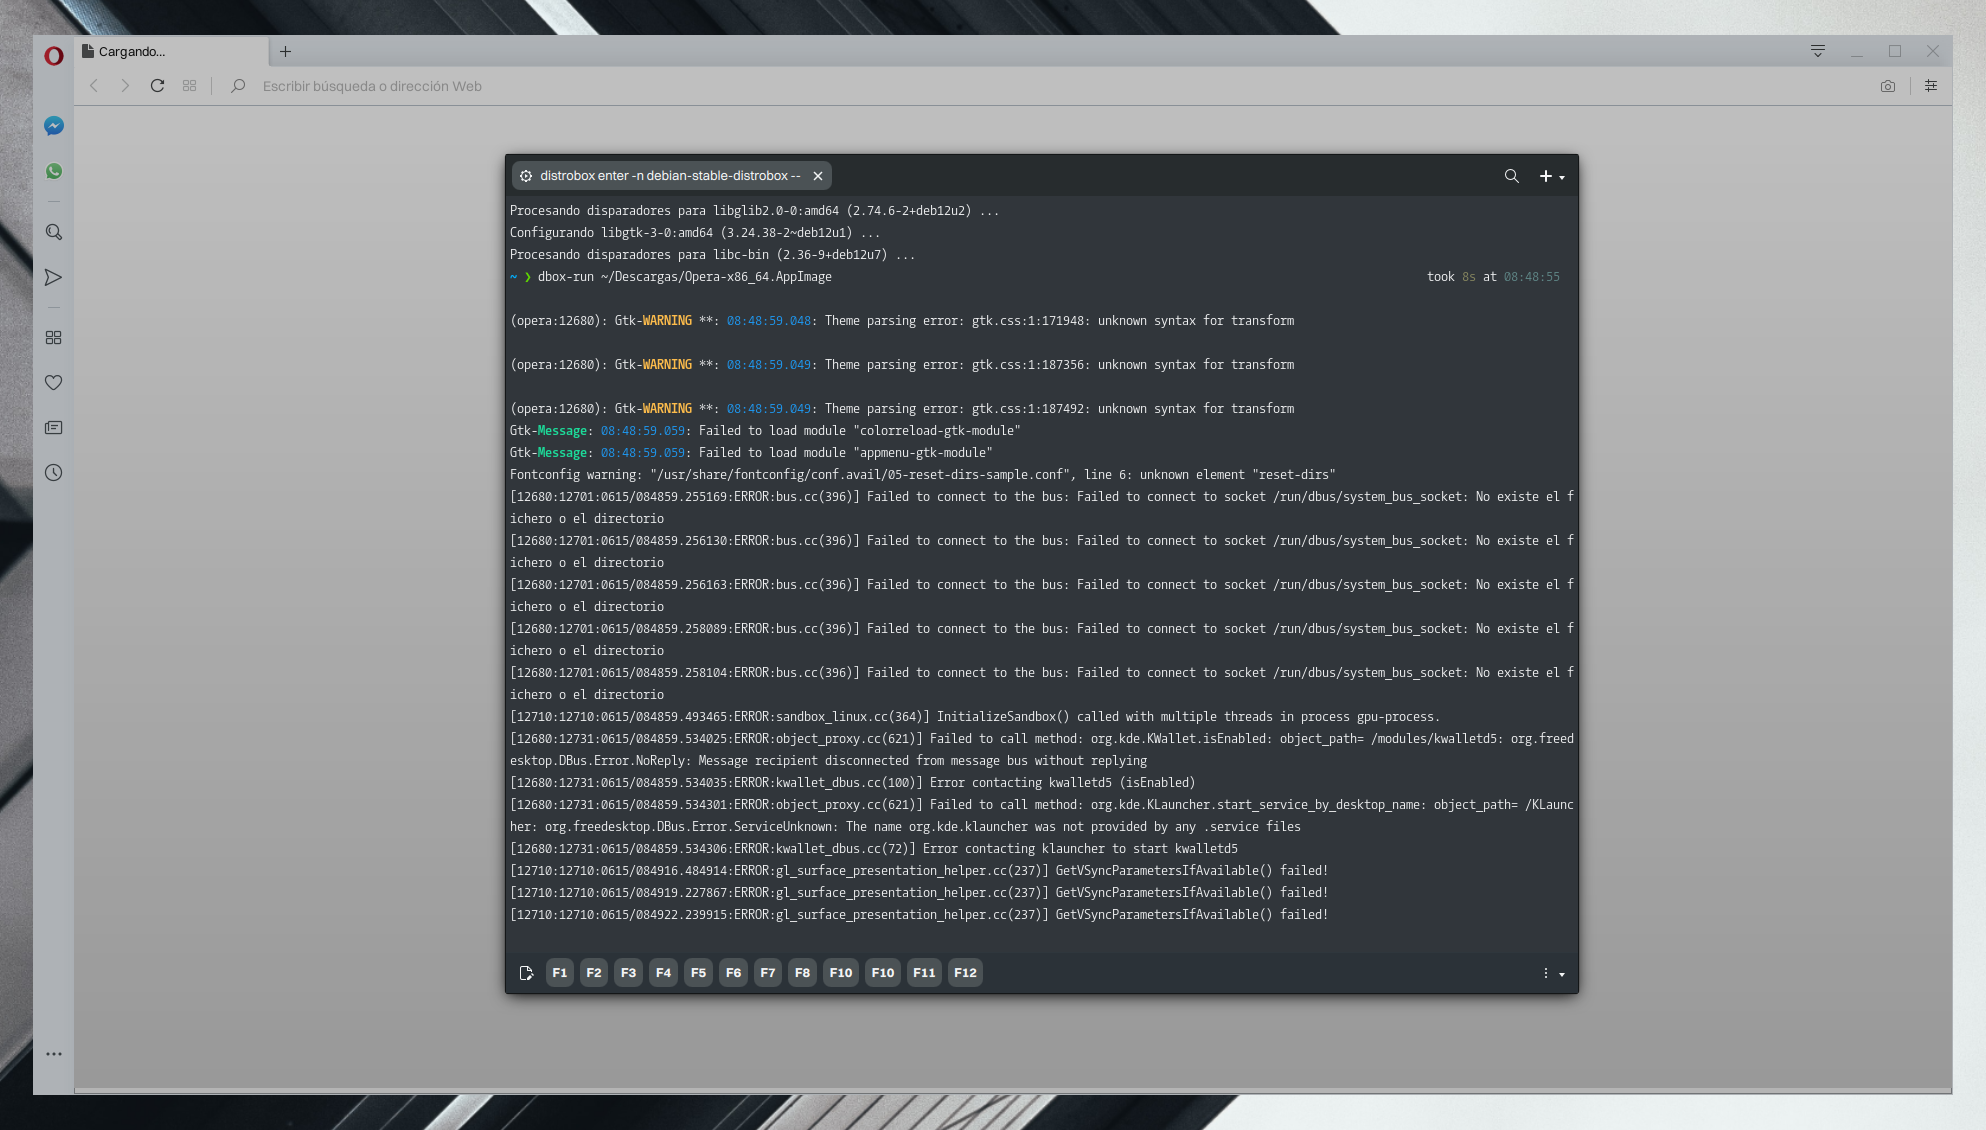
We can create a desktop launcher in $HOME/.local/share/applications, so it’s available in the applications menu to run the command above and execute the AppImage using our newfound “runtime.”
About Rootful Containers in Distrobox
A root container may be necessary when an application needs access to USB devices, needs to modify internal storage devices, uses specific hardware features, or, in other edge cases, when a hypervisor uses libvirt.
As discussed on the Distrobox bug tracker, the Distrobox developer doesn’t consider sandboxing to be within the scope of Distrobox. For this reason, we recommend (at least) installing AppArmor within the container and isolating the executable with a policy.
Use root containers at your own risk!
Troubleshooting
⚠️ Important: The instructions below are speficially for the container used as an example for this tutorial (Debian stable); adapt to your needs if you’re using a different container.
Fix Locale Errors in Containers
While this doesn’t affect the container’s functionality, do the following to suppress Perl warning messages about localization. Select only the appropriate locale, and that’s it- no more errors.
- ⚠️ Important: These messages appear because the host’s locale differs from the container’s; this is not a Nitrux bug.
distrobox enter -n debian-stable-distrobox -- sudo apt install -y --no-install-recommends locales
distrobox enter -n debian-stable-distrobox -- sudo dpkg-reconfigure locales
Issues with PolicyKit Authentication
Software that uses PolicyKit for authentication will not work out of the box due to container and DBus issues, a known issue with Distrobox, as noted in developer’sper’s comment on the Distrobox bug tracker; it’s not a Nitrux bug. However, we can work around this issue:
distrobox enter -n debian-stable-distrobox -- sudo mkdir /run/dbus
distrobox enter -n debian-stable-distrobox -- sudo ln -s /run/host/run/dbus/system_bus_socket /run/dbus/system_bus_socket
After doing this, to run software that requires PolicyKit authentication, we use: sudo -E
Forcefully Stopping all Containers
Do the following to stop all containers created using Podman (the default in Distrobox).
podman container kill -a
Forcefully Removing all Containers
Do the following to remove all containers created using Podman (the default in Distrobox).
podman container rm -f -a
Misc. Problems in a Container
Other problems users may encounter in a container are detailed below.
- The command
pingdoes not work right away inside a container. It’s necessary to change a Sysctl setting and create the container with a specific flag.- First, change the value of
net.ipv4.ping_group_rangefrom1 0to0 2147483647 - Then, create the container like this
distrobox create ... --additional-flags "--cap-add=NET_RAW"- 🔰 Information: The Distrobox bug tracker lists this problem as “not planned”.
- First, change the value of
That’s it; this concludes today’s tutorial.