Rufus (Windows)
If you are using Windows and Rufus, follow these steps:
- Download a Nitrux ISO file, and download and install Rufus.
- Insert the USB flash drive into a USB port, then launch Rufus.
- Rufus will update the device within the ‘Device‘ field. If the ‘Device‘ selected is incorrect (perhaps you have multiple USB storage devices), select the correct one from the dropdown menu in the device field.
- Now, select the Boot selection. The choices will include Non-bootable, FreeDOS, Disk, or ISO image. Select “Disk or ISO image.”
- To select the Nitrux ISO file you downloaded previously, click SELECT to the right of “Boot selection.” If this is the only ISO file in the Downloads folder, you will see only one file listed. Select the appropriate ISO file, then click Open.
- The default selections for the Partition scheme (GPT) and Target system (UEFI (no CSM)) are appropriate (and are the only options available).
- Rufus will update the “Volume” label to reflect the ISO selected. Leave all other parameters at their default values, then click START to initiate the writing process.
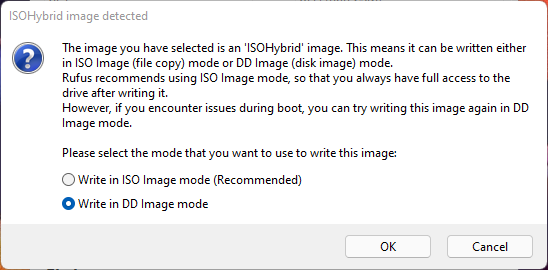
- When prompted to select which mode to write this image, choose to Write in DD Image mode.
- Rufus will now write the ISO to your USB stick, and the progress bar will show your progress. With a reasonably modern machine, this should take around 10 minutes. Rufus displays the total elapsed time in the lower-right corner of the Rufus window.
- When Rufus has finished writing the USB device, the Status bar will be green-filled, and the word READY will appear in the center. Select CLOSE to complete the writing process.
Troubleshooting
Rufus 4.2.4070 Beta introduced a feature to display a warning about revoked UEFI bootloaders: “Add detection and warning for UEFI revoked bootloaders (including ones revoked through SkuSiPolicy.p7b).” Doing this will cause Rufus to display a warning message. Users can ignore this warning, as the bootloader post-installation is signed; however, the bootloader in the ISO isn’t signed, nor are the kernels, and the distribution will not boot with Secure Boot enabled.
- See this issue at the Rufus repository for context about this warning.
- Also, see this reply in a Reddit thread of the Rufus developer about their reasoning for implementing it.