
Updated Jan 3rd, 2022.
In our previous article, we talked about how znx works. If you haven’t, go and check it out. With that out of the way, let’s get to the nitty-gritty of this article. Since the release of znx, many have asked us how they install Nitrux using znx, and the official answer is by executing znx init and znx deploy, as we mention in the Compendium and the FAQ.
But what happens when there’s only a single device? It would mean deleting all your files, which is, of course, not desirable. However, you can use our ISO files and keep your existing system installation (and user data) intact!
Today we will check out how to integrate a znx-compatible ISO image into an existing installation of a Linux distribution. For this example, I will use Xubuntu 20.04.03, albeit none of what we’ll do is specific to XFCE (or Ubuntu, for that matter).
What does “Integration” mean?
That is a good question. What I mean by integration is deploying (which in the context of znx is equivalent to installing) and managing (upgrade, downgrade, etc.) a znx-compatible ISO image to an existing Linux partition without removing it by reusing the existing root partition and the process is pretty straightforward.
So, with the premise in mind, what do you do?
I will be using Virtualbox for clarity, but none of the steps below are specific to Virtualbox.
Obtaining the necessary files
Boot into your Linux installation (in this case, I installed Xubuntu) and go to the znx repository at GitHub to download the latest AppImage (master) from the Releases page to your Home directory. Let’s assume that you’ve downloaded the file to your Downloads directory.
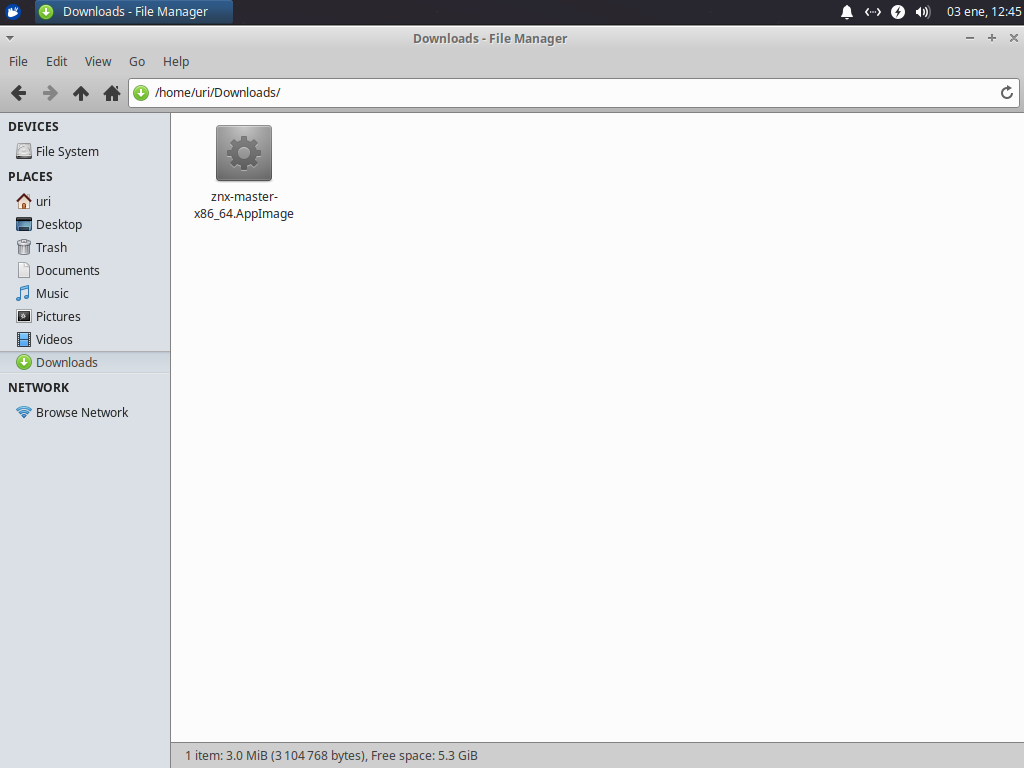
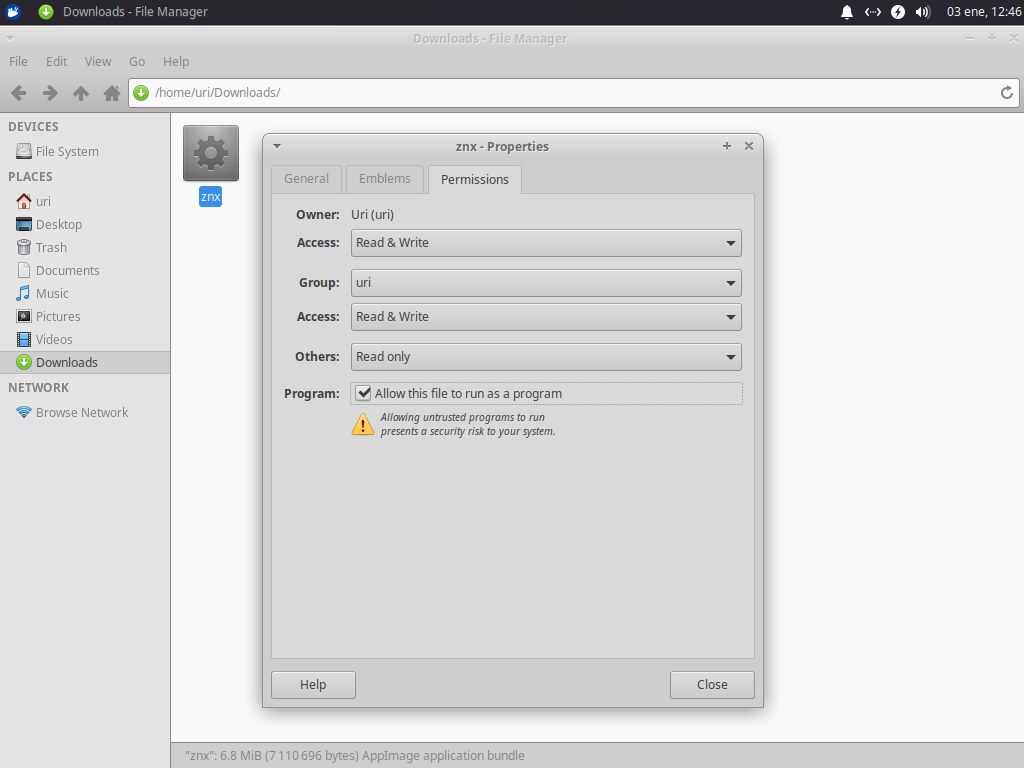
Now, proceed to rename the file to znx so we don’t get confused with a long file name.

Then, give the file executable permissions.
Now, open a terminal window, navigate to the Downloads directory, and extract the AppImage file.
cd Downloads && ./znx --appimage-extract
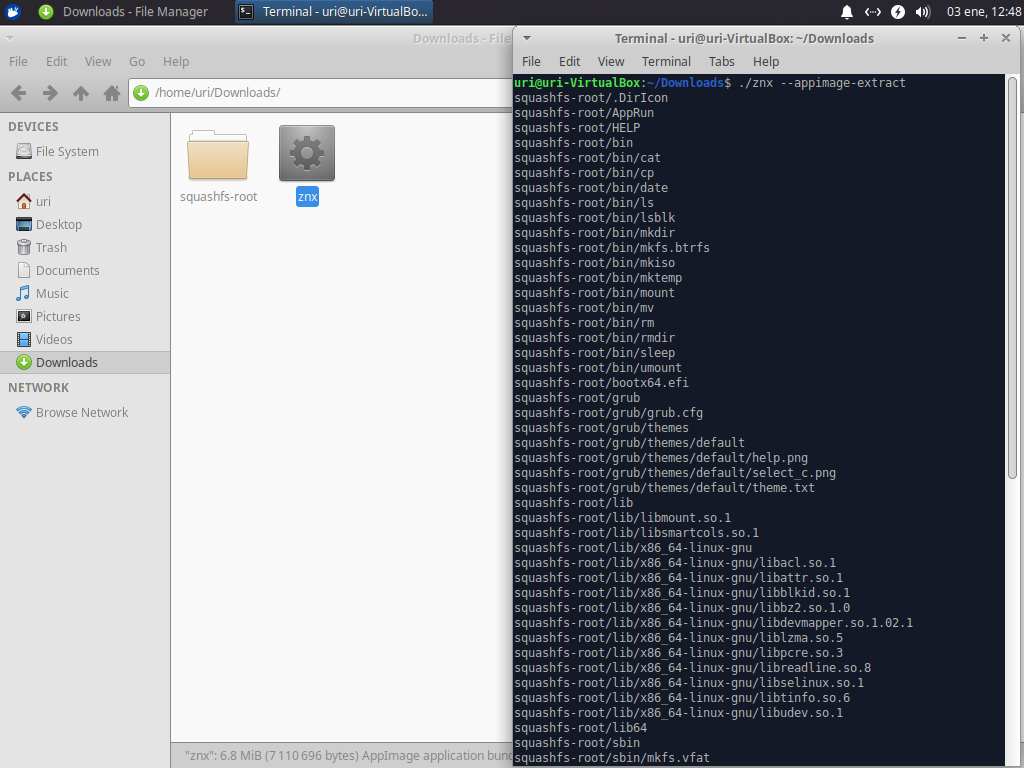
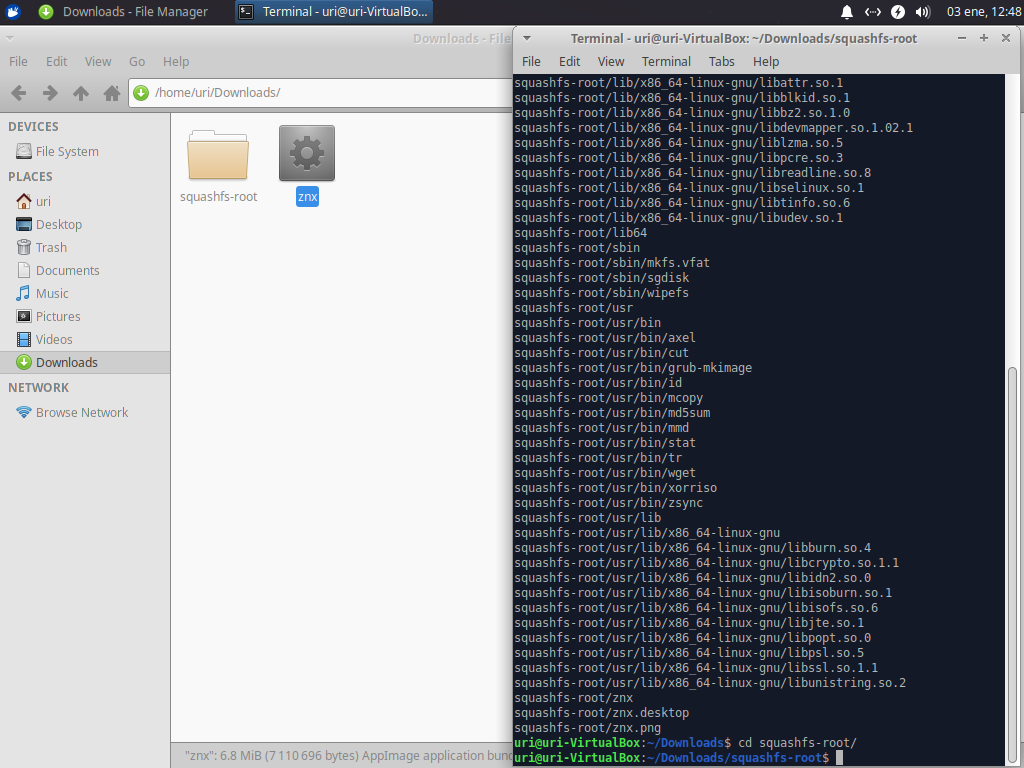
A new directory will be created, which is squashfs-root; this directory has the contents of the Appimage. Now, in the terminal window, navigate to the squashfs-root directory.
cd squashfs-root
Ok. So, now we need to install a new package to Xubuntu; we need to install grub-efi-amd64 or the equivalent package in your distribution. This package will add the necessary GRUB modules that znx requires.
sudo apt install grub-efi-amd64
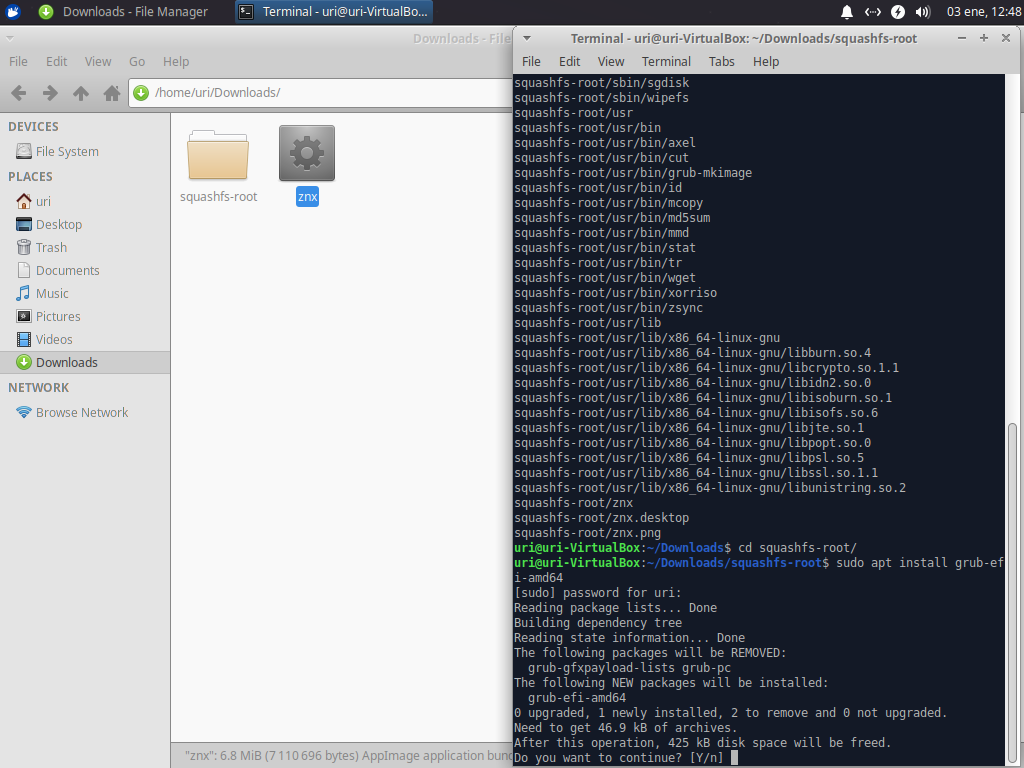
You will be asked to confirm this action, so press Y. After the installation is complete, open a new tab in the terminal window.
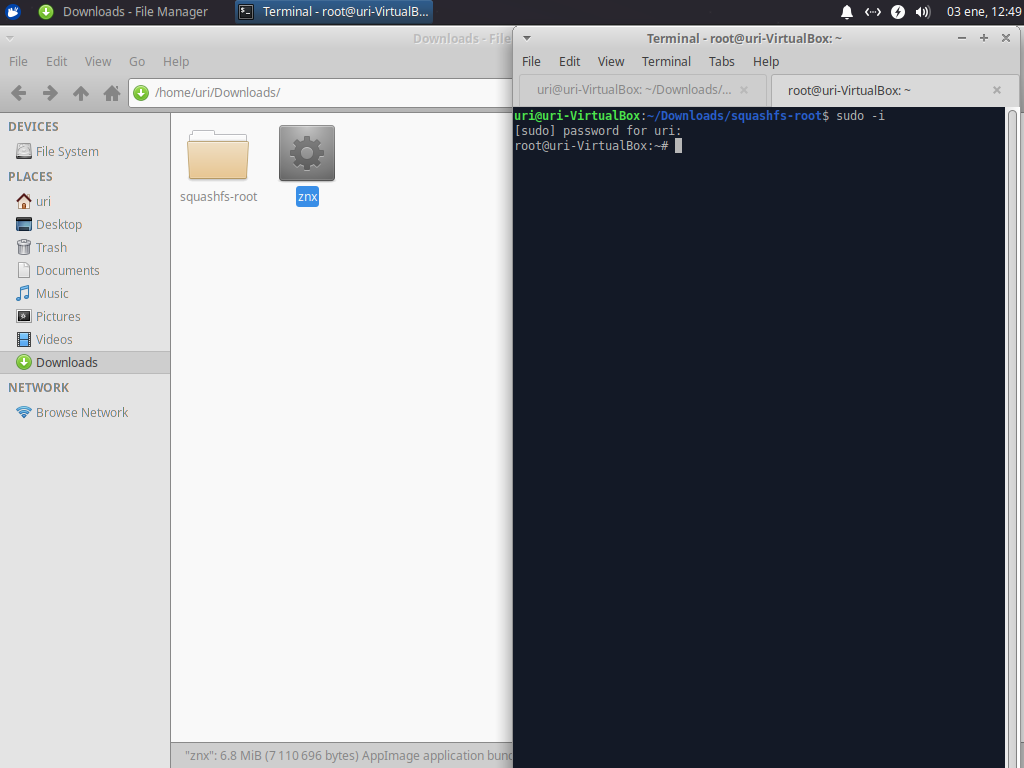
Please remember that the following steps will be performed using the root account.
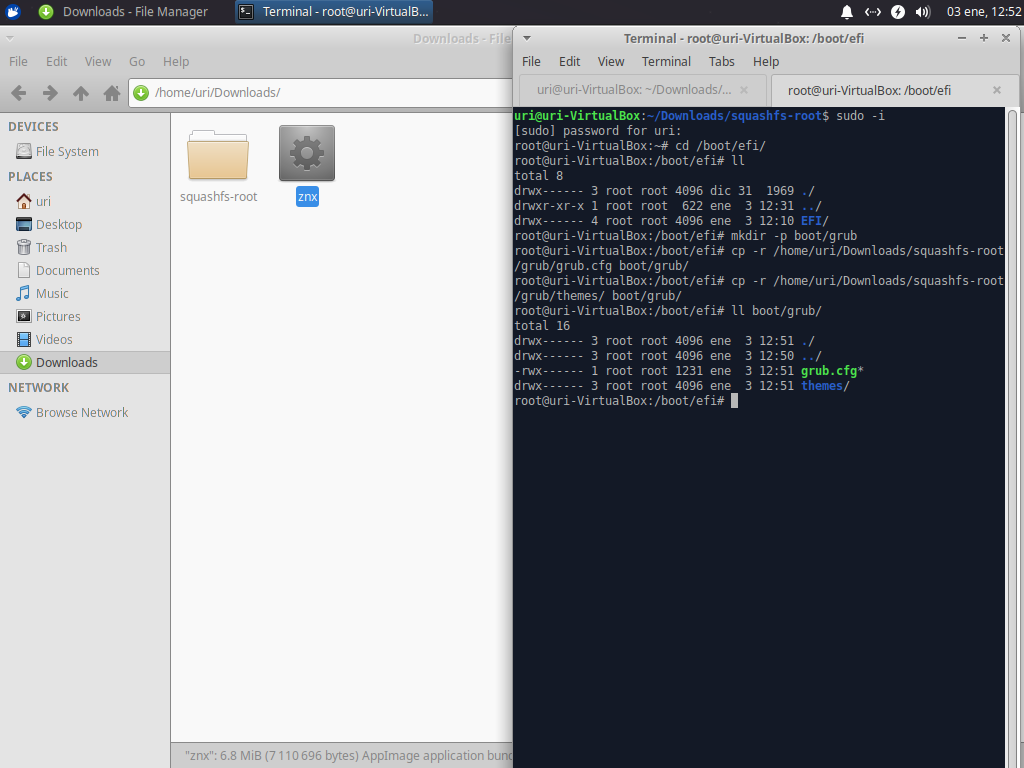
Now we need to navigate to the /boot/efi directory. However, if we attempt to do this with our user account, we will be presented with a message that says Permission denied. To avoid this, switch to the root account.
sudo -i
Now that you’re root, navigate to /boot/efi and type ll (that’s two lowercase L), and press enter; this will list the directories in this path. Then, create a directory tree called boot/grub.
cd /boot/efi && mkdir -p boot/grub
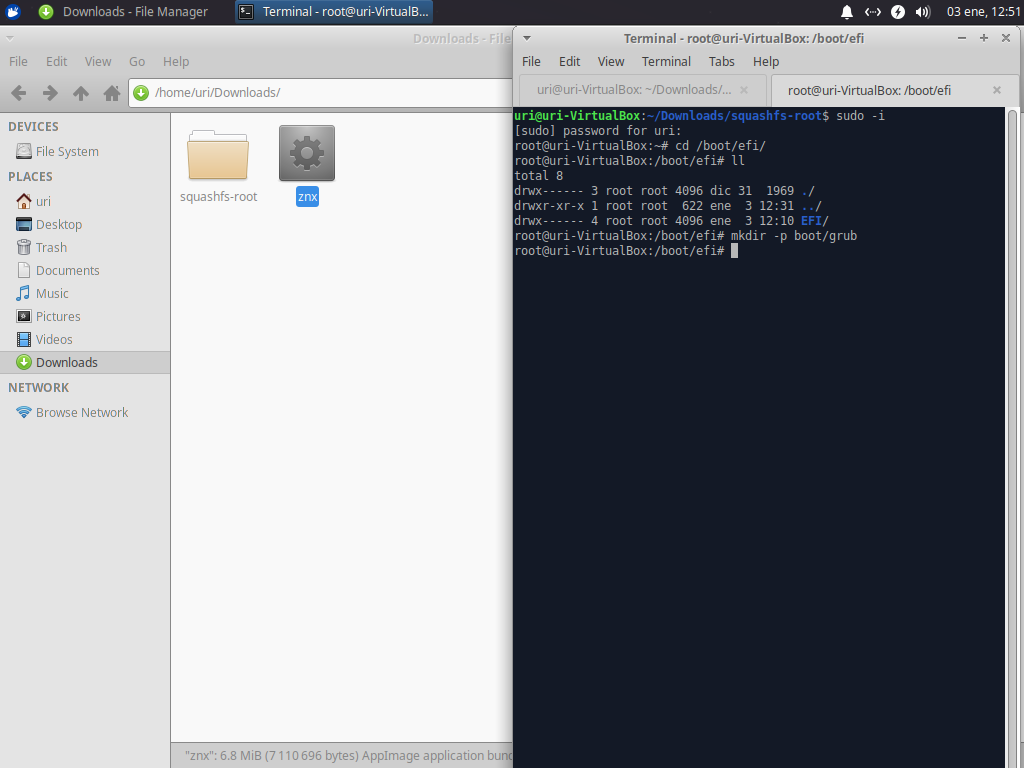
Then, create a new boot directory using mkdir -p boot/grub; this command will create the empty boot and grub directories. We must copy the grub.cfg and the themes directory from the znx AppImage we extracted earlier to boot/grub; we will do this using the command cp.
cp -r /home/$USERNAME/Downloads/squashfs-root/grub/grub.cfg boot/grub
cp -r /home/$USERNAME/Downloads/squashfs-root/grub/themes boot/grub
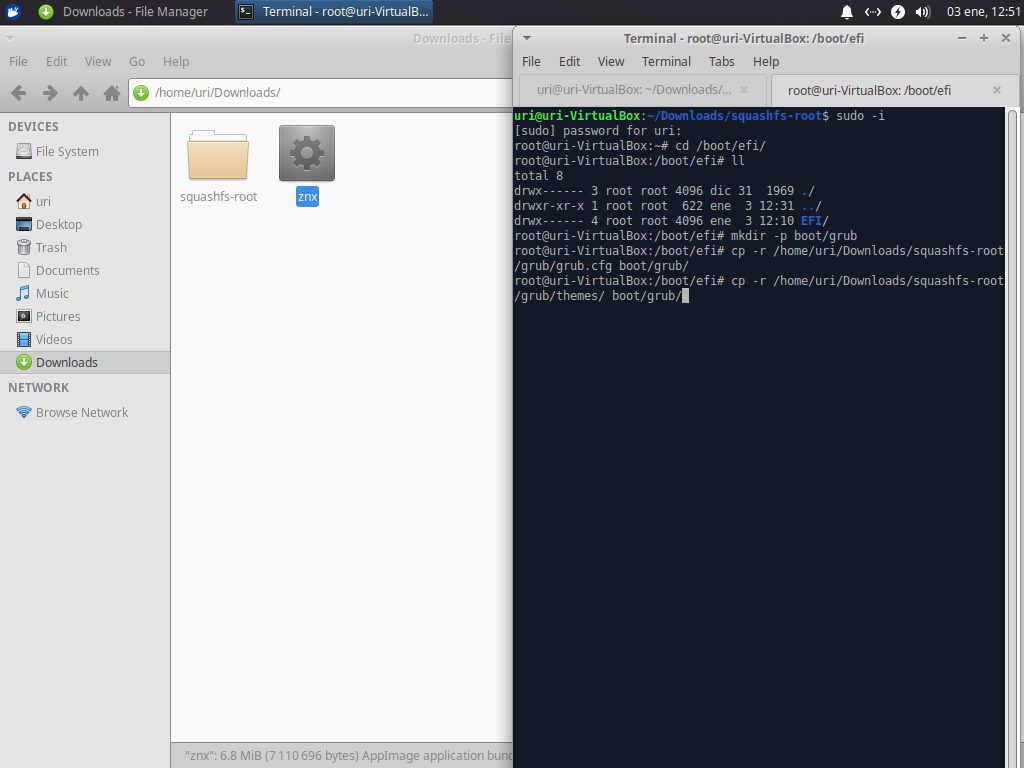
We can verify that the files are in the correct path by typing ll/boot/grub (two lowercase L) and pressing enter.
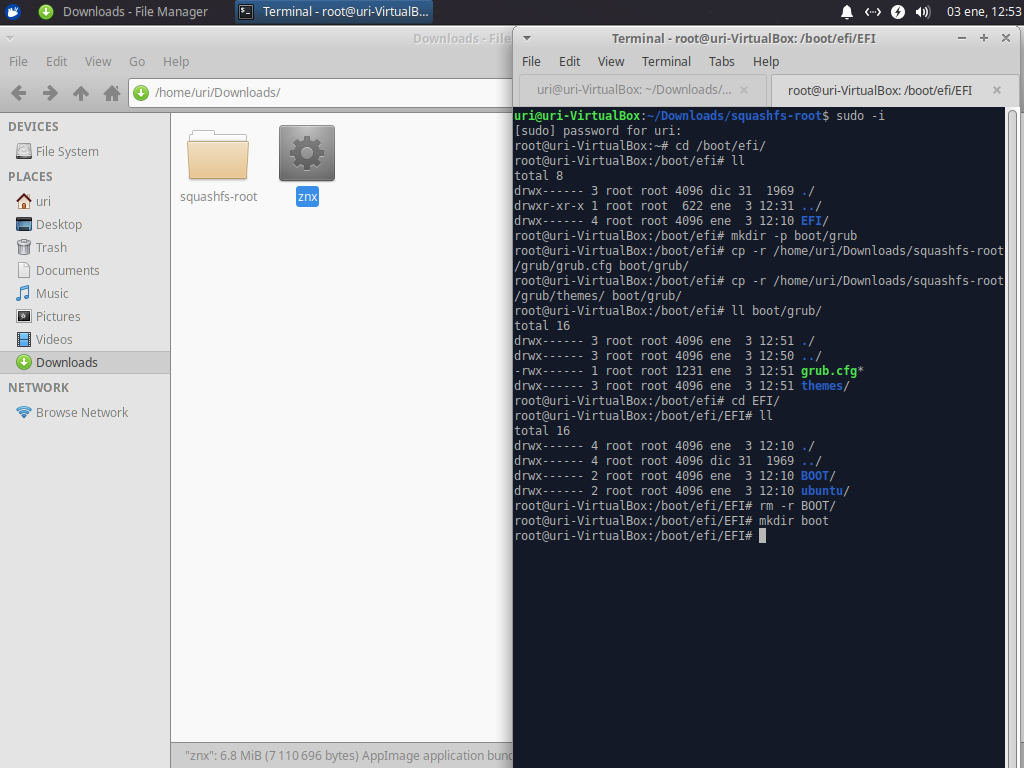
Next, we navigate to the EFI directory and delete the BOOT directory’s contents inside it. Then we create a new directory called boot (lowercase).
cd EFI && rm -r BOOT/ && mkdir boot
Then, we copy the file bootx64.efi from the squashfs-root folder to the EFI/boot directory.
cp -r /home/$USERNAME/Downloads/squashfs-root/bootx64.efi EFI/boot
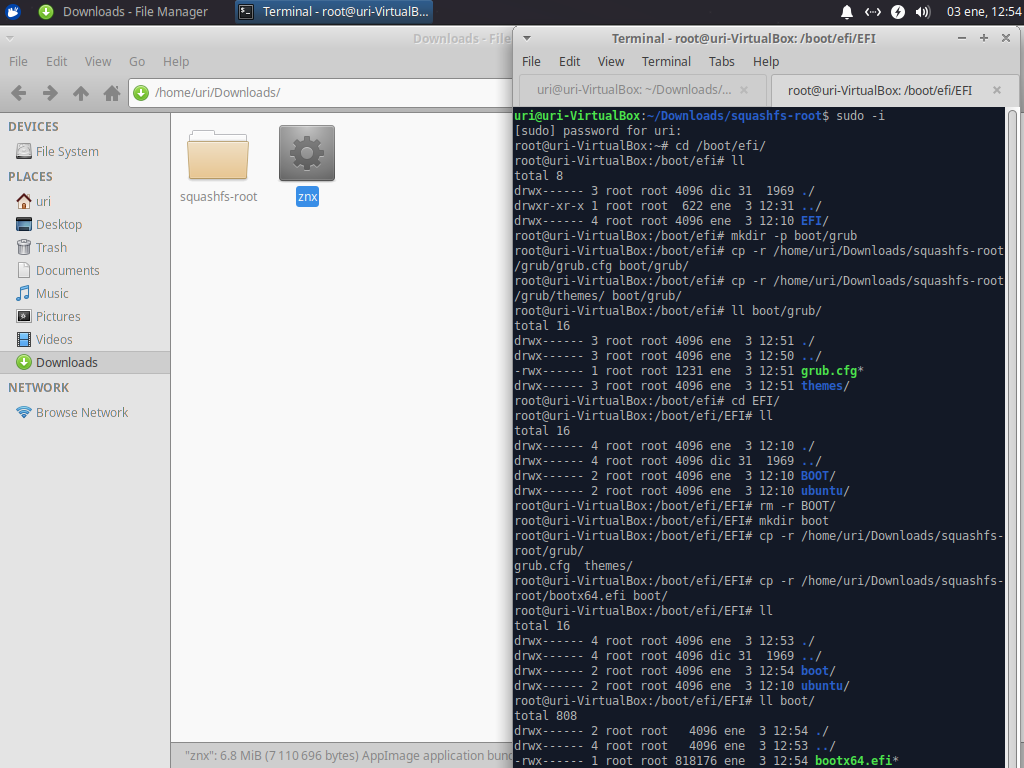
We need all the files; you can remove the squashfs-root directory.
Adding an entry to the EFI boot menu
Now, we will add an EFI boot entry available from the EFI/UEFI firmware boot menu. This boot menu is the menu that is available when the computer is booting and (depending on the computer) can be displayed using F12 or F10, or other combinations of keys.
The EFI firmware boot menu is not confused with the GRUB boot menu.
To create an EFI boot entry, we pass the following arguments to efibootmgr:
- –create (-c) to create a new entry.
- –part (-p) followed by the partition number on which the EFI System Partition is hosted.
- –disk (-d) followed by the disk on which the EFI System Partition is hosted.
- –label (-L) followed by the label to use as the boot entry.
- –loader (-l) followed by the path of the EFI image to boot.
In the example, the storage device is a SATA device (sda/b/c etc.) for NVME devices it is /dev/nvmeXnY (i.e., nvme0n1).
efibootmgr -c -d /dev/sda -p 1 -L "znx" -l "\EFI\boot\bootx64.efi"
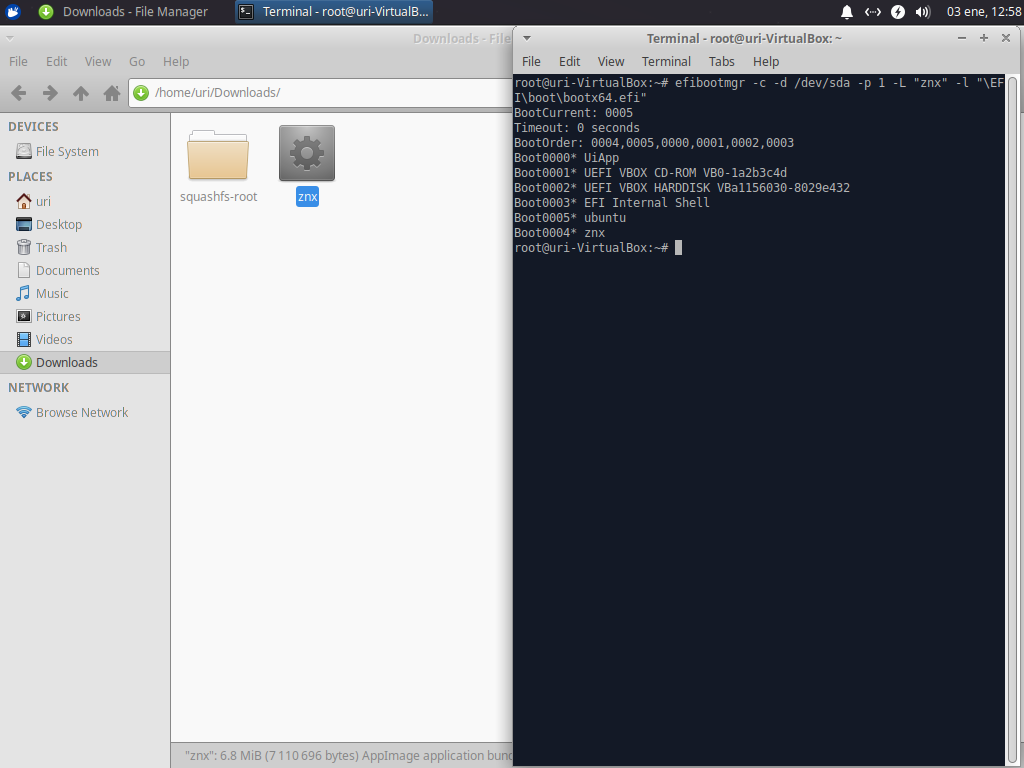
Then, verify that the EFI entry is pointing to the correct loader file.
efibootmgr -v
The output of the command efibootmgr shows us that the entry we just added is number 0004 (Boot0004); it tells which physical device is the bootloader file too.
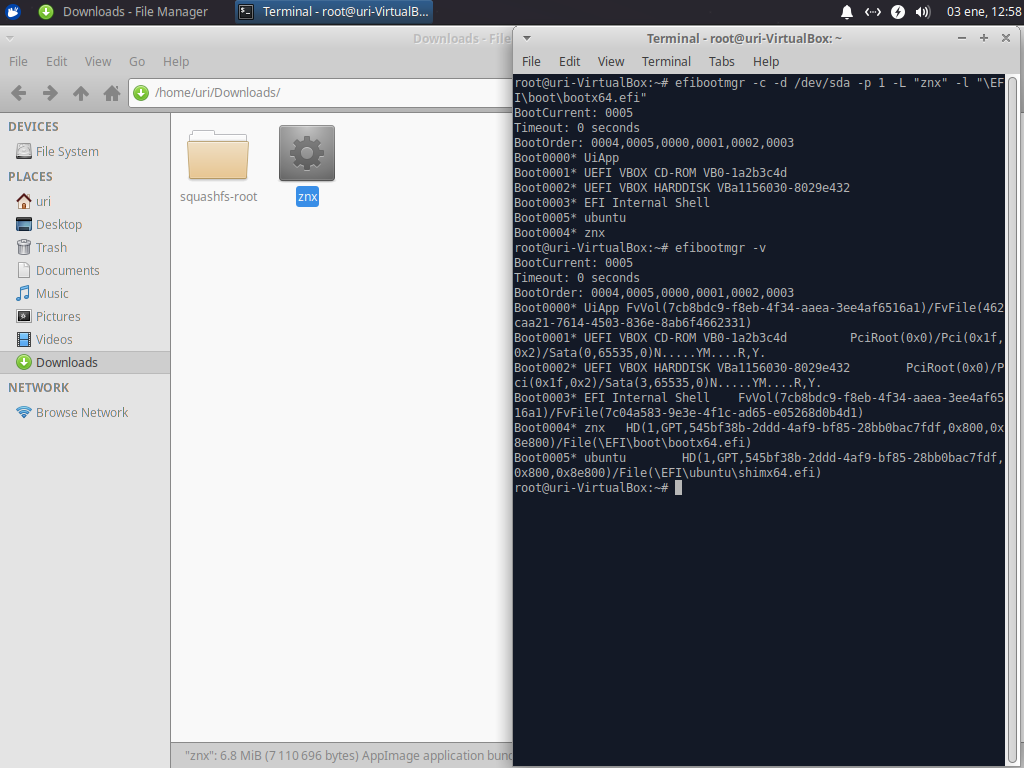
The next time we reboot, we will see an EFI entry for znx and ubuntu and the EFI entries for the hardware devices.
Now you can exit the root account by typing exit.
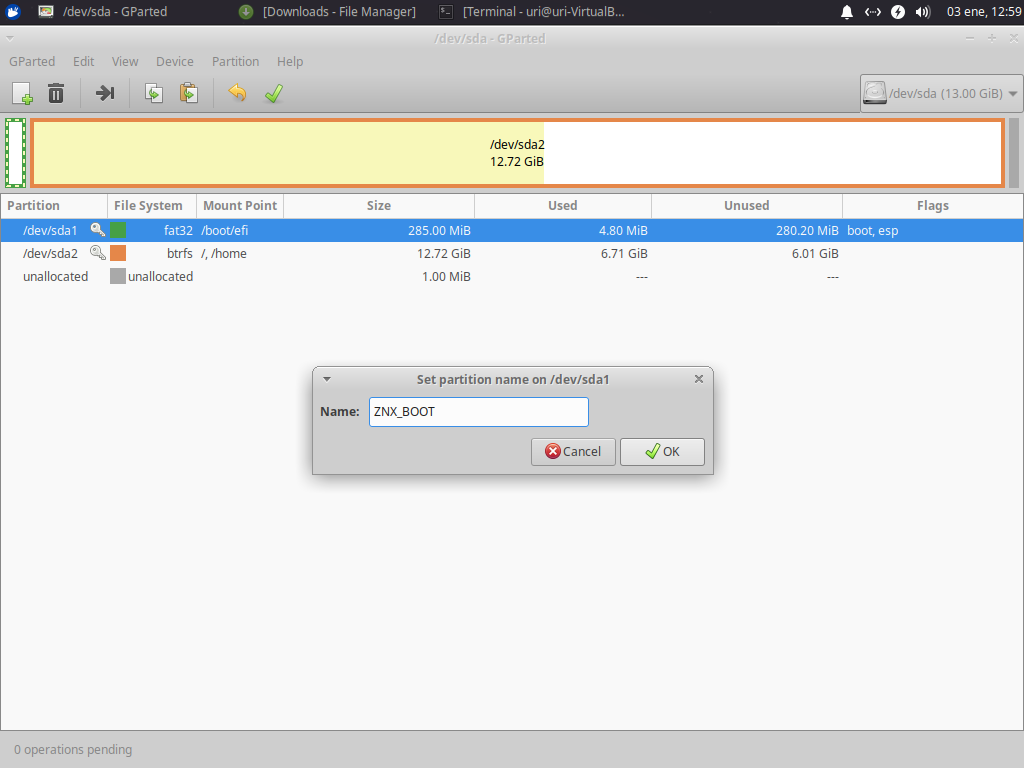
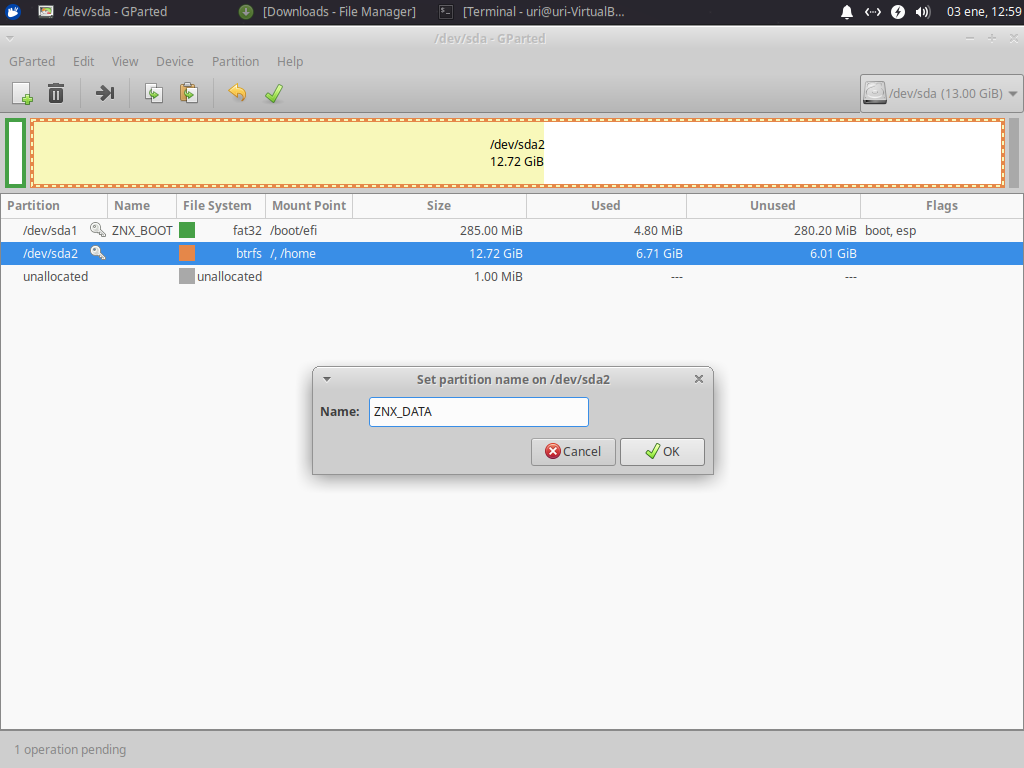
Add partition labels for znx
For this part, we will need to change the label of the partitions to those required for znx. We will need to change the EFI System Partition label to ZNX_BOOT and the Root partition to ZNX_DATA since this is where we will be deploying our znx compatible ISO file, and znx will save the user data with OverlayFS.
If you don’t set the partition labels, znx will not manage the ISO files.
By default, if you used the automatic installation mode in the Ubiquity installer, only the ESP has its label set to “EFI System Partition.” To change the partition labels, we will be using GParted, so if you don’t have it installed already, please install it.
Open GParted, right-click the partition, and select “Name Partition,” now, change the name to ZNX_BOOT. Do the same for the Root partition and enter ZNX_DATA, then press “OK.”
Please note that ZNX_DATA is a Btrfs partition; if the storage device uses another filesystem, such as Ext4, the data persistence will not work.
To apply the changes, click the green checkmark button at the top of the window, then select “Apply.”
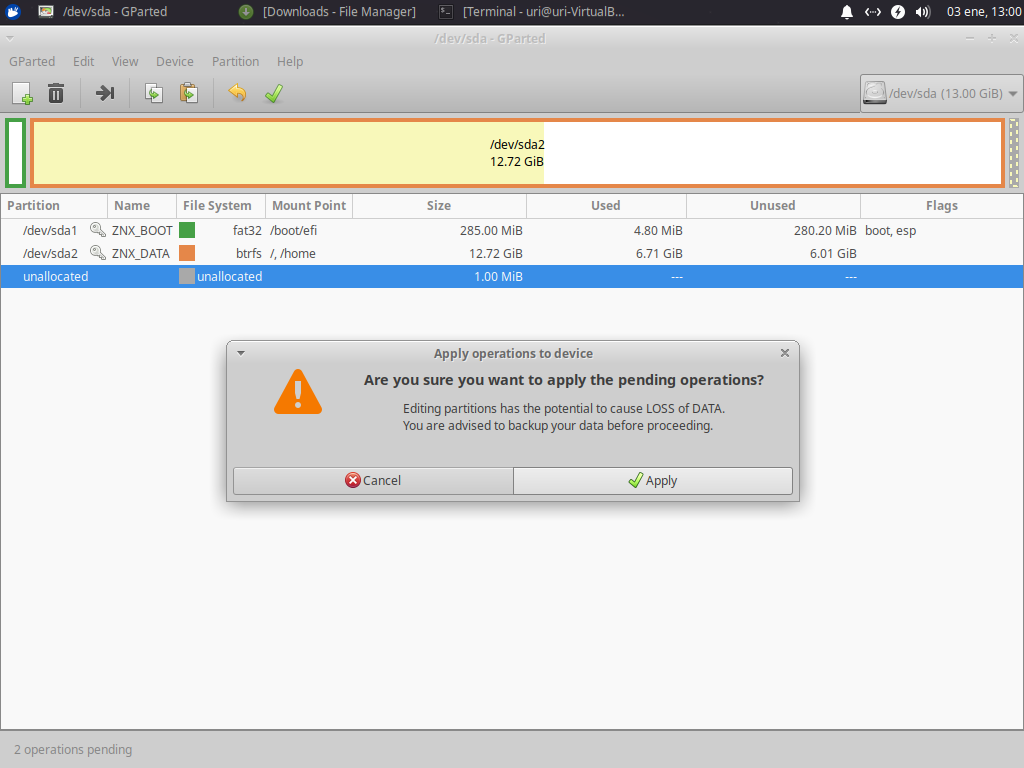
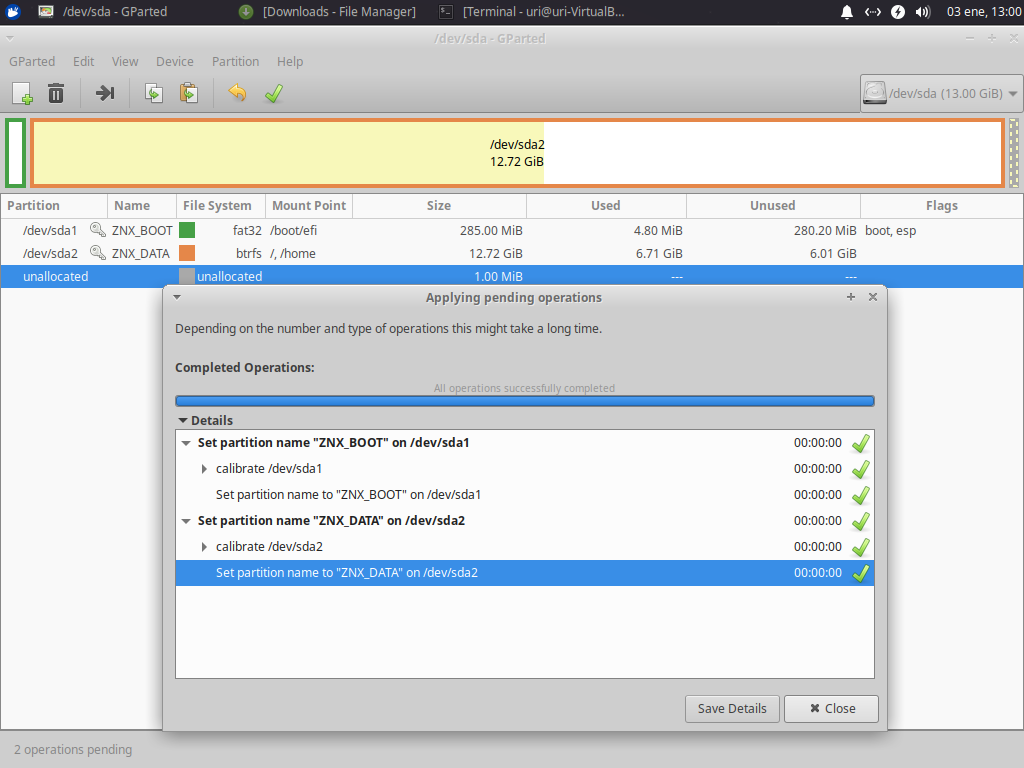
GParted will change the partitions, and they will have new labels (or names as GParted refers to them).
And that’s it, now to the final steps.
Add znx to the PATH
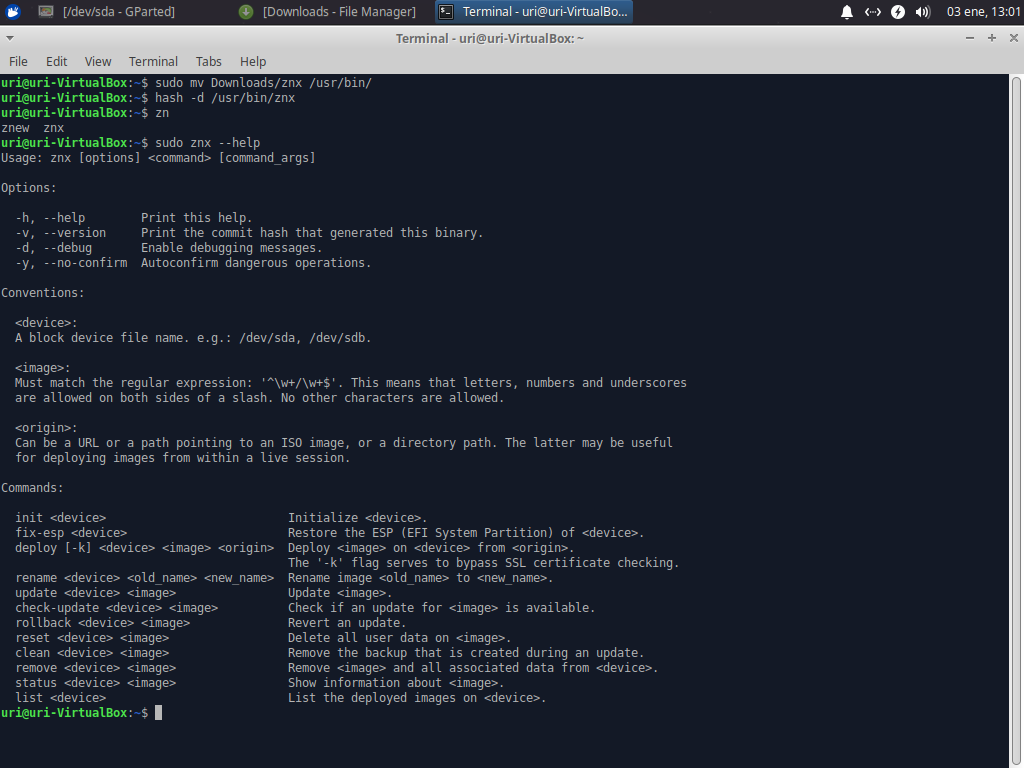
We can now move the znx AppImage to our PATH. Use mv to move the file to /usr/bin and execute hash -d /usr/bin/znx to update the cached paths. Now we can access znx from everywhere without typing ./ first.
sudo mv Downloads/znx /usr/bin
hash -d /usr/bin/znx
Testing that everything works
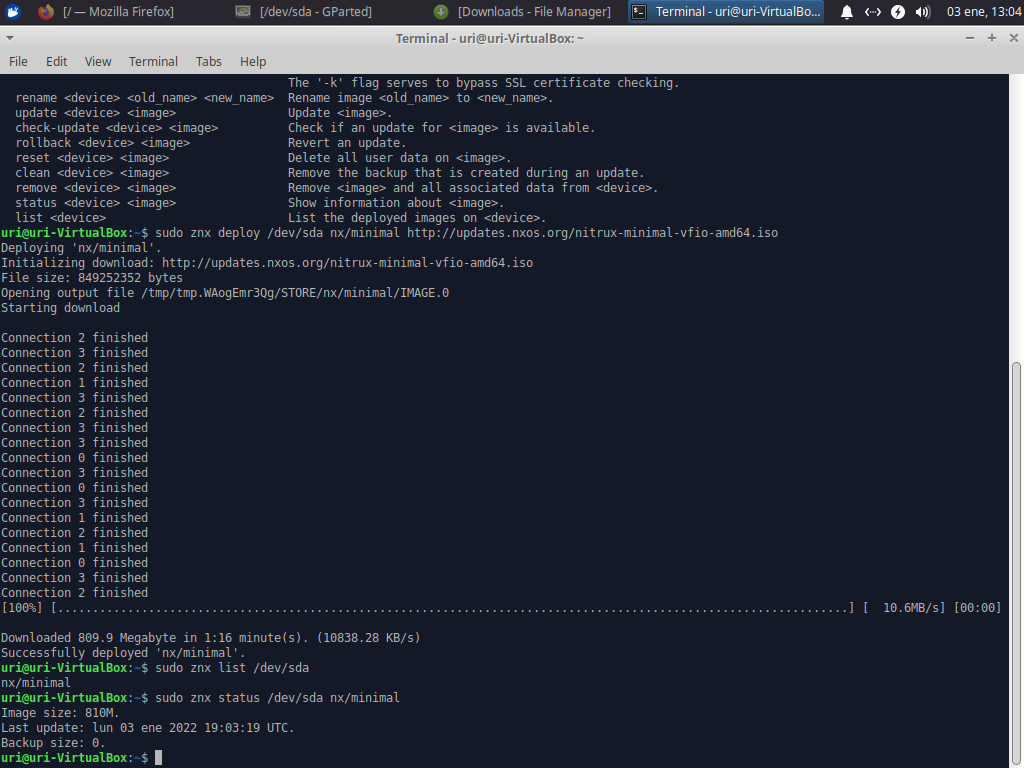
Now that we have added the files and the labels, znx can use the existing Root partition to deploy images. This is the easiest step; to test this, let’s deploy a new znx-compatible ISO file.
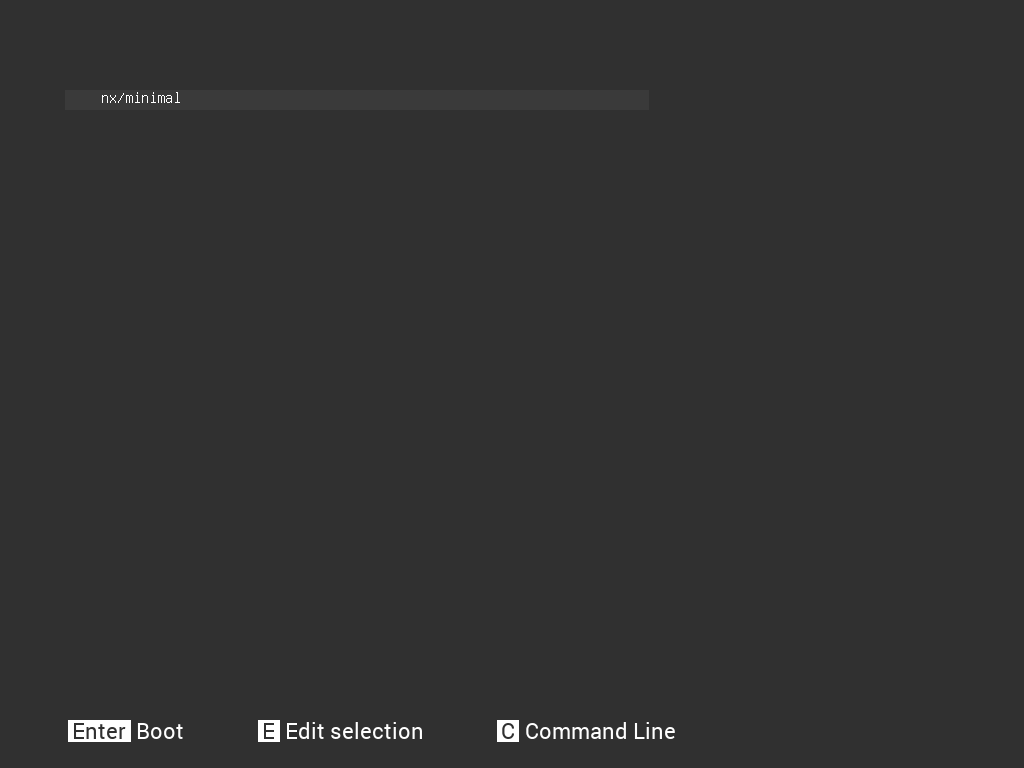
sudo znx deploy /dev/sda nx/minimal http://updates.nxos.org/nitrux-minimal-vfio-amd64.iso

znx can deploy images, hurrah! Also, since we set the labels, the rest of the functionality is available. That means we can deploy, upgrade, downgrade, and remove images.
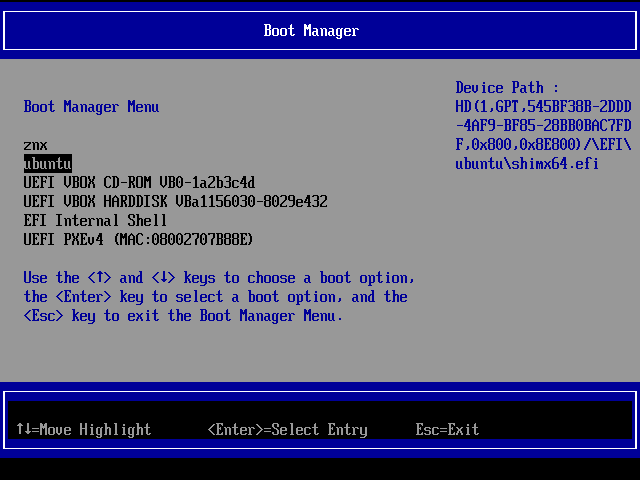
The image below is from the Virtualbox EFI boot menu (or Boot Manager). As we can observe, we added the EFI entry of znx, and if we select it, the computer will display the znx boot menu. Press ESC when the virtual machine is booting up to access this menu.
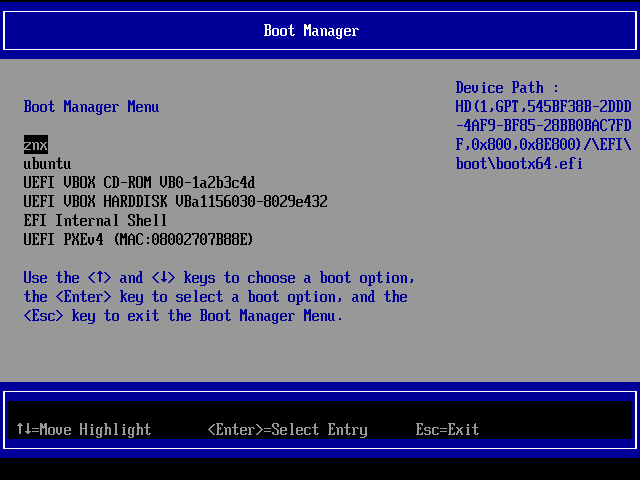
And now, we can deploy as many znx-compatible images as we want!
And if we wanted to boot into Xubuntu, we’d select the ubuntu boot entry.
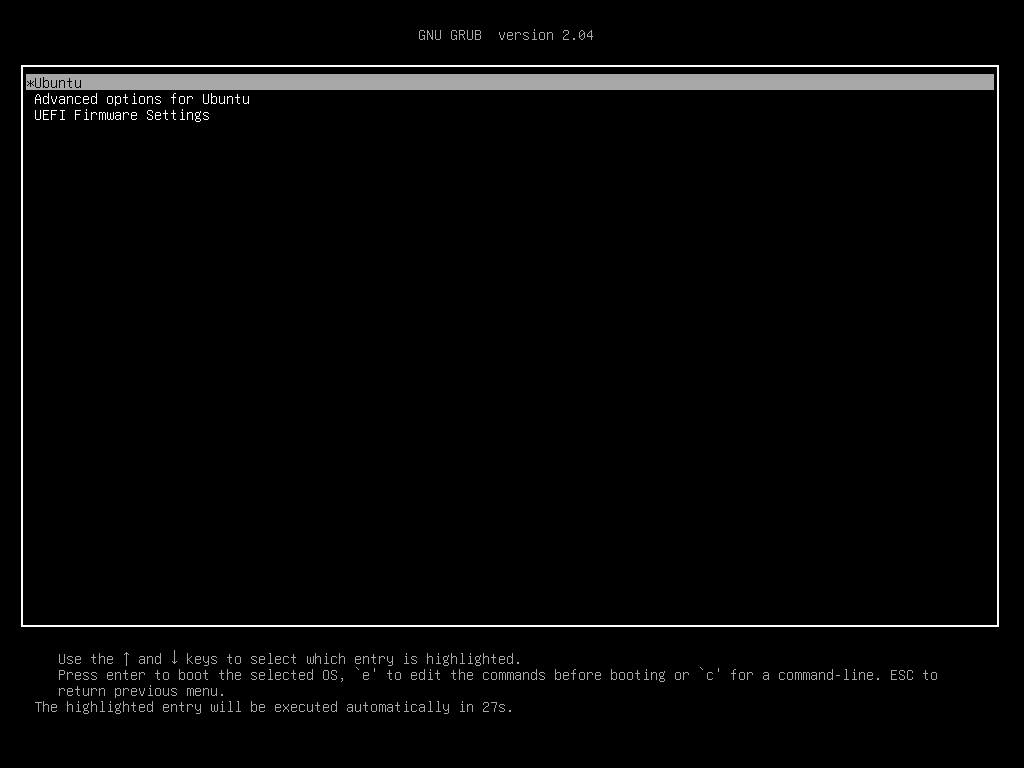
Then, if we press ESC again after selecting the ubuntu boot entry, we will access the Xubuntu GRUB boot menu; this means that we didn’t break anything and can access both systems.
Conclusion
The article proves something, and that is that znx is sufficiently flexible. There’s no denying that znx has to provide this functionality independently. But this clarifies that you do not have to wipe your storage device to deploy Nitrux if you don’t want to do that.
Ultimately, you can easily integrate the znx ISO images into an existing installation.