
Update 01/01/23: Please note that the information below is aimed at an old release of this distribution and does not pertain to the current release.
Wayland and PipeWire are poised to be the future of Linux display and audio servers, respectively. Today’s tutorial will check how to use Wayland and PipeWire in Nitrux.
Difficulty: ★★☆☆☆
Installing extra PipeWire packages
By default, Nitrux includes some PipeWire packages (pipewire and pipewire-bin), so we will add more packages necessary for PipeWire work.
- First, update the package index and check package upgrades.
- Second, we need to update the package nitrux-repositories-config. The latest version is 1.0.7+dfsg; see fig. 1.
-
- This upgrade will be valid only for Nitrux 2.2.0 and below, or if you haven’t upgraded your installation, skip this step if you’re using the latest release of Nitrux.
-
- Third, we install the rest of the PipeWire packages we need.
pkcon refresh && get-updates
pkcon install nitrux-repositories-config
pkcon install gstreamer1.0-pipewire libpipewire-0.3-{0,common,modules} libspa-0.2-{bluetooth,jack,modules} pipewire{,-{alsa,bin,jack,pulse,v4l2}} wireplumber
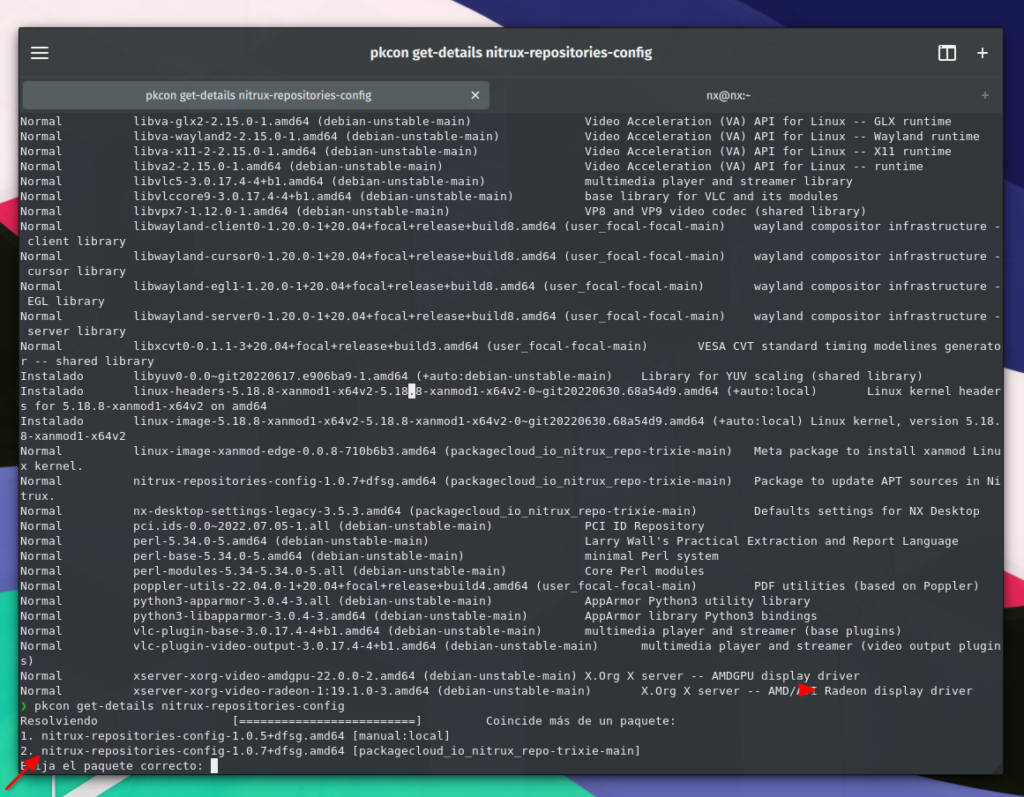
fig. 1. Output of pkcon refresh and pkcon get-details.
Now that we have updated and installed the necessary packages, we need to disable the PulseAudio service with OpenRC. To do this, run the following command.
sudo rc-update del pulseaudio-enable-autospawn default
We can reboot to stop using PulseAudio at this point.
Enabling audio in PipeWire
After installing the packages, we need to add a file to the following path ‘/etc/security/limits.d/‘ in the format ‘username.conf’; for example, the username in my VM is nx so that the file is called ‘nx.conf’.
Use sudo micro to create and edit the file.
sudo micro /etc/security/limits.d/nx.conf
Below is the content of the file; replace the username accordingly.
nx  soft    memlock 64
nx  hard    memlock 128
Then, create a group called pipewire and add your user.
sudo groupadd pipewire
sudo usermod -a -G pipewire nx
Reboot.
Next, we need to start PipeWire and Wireplumber using our users. To do this, we need to create a shell script, and to autostart the script, go to System Settings>Startup and Shutdown.
#! /bin/zsh

set -x

# -- Start PipeWire processes

for process in pipewire pipewire-pulse wireplumber
    do nohup $process &
done

# -- Download sample file to test with aplay

audio_sample=$HOME/.local/share/sounds/pop1.wav

if [[ ! -f $audio_sample ]]; then
    echo "File not found! Downloading..." 2>&1
    mkdir -p "$HOME/.local/share/sounds"
    axel -a -q -o "$HOME/.local/share/sounds/pop1.wav" -n 10 https://www.pachd.com/sfx/pop1.wav
    else
        echo "File found! Do nothing..."
fi

# -- Reproduce sound to make PipeWire work

for device in default sysdefault pipewire
    do nohup aplay -D $device $audio_sample &
done
Then make the script executable. I called the script autostart-pipewire and moved it to a path in the $PATH. When the script runs, you will hear a pop sound, meaning PipeWire is outputting audio.
chmod +x autostart-pipewire
sudo mv autostart-pipewire /usr/bin
To test audio manually, use a WAV file for ease of use. The script above will run an automated test using a small sample file.
- Test first with the default device, then with pipewire.
- Note: For an unknown reason, using aplay -D pipewire BEFORE aplay -D default or sysdefault or simply testing a file without doing so will result in no audio. Run aplay -D default or sysdefault FIRST.
aplay -D default /path/to/audio.wav
aplay -D sysdefault /path/to/audio.wav
aplay -D pipewire /path/to/audio.wav
For further testing, try Firefox and a YouTube video.
We can check the audio server in use with the following command; see fig. 2.
pactl info
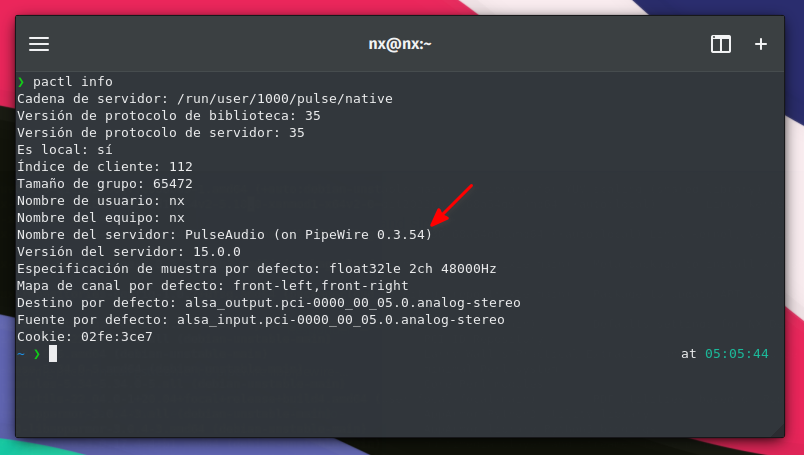
fig 2. pactl info output.
Installing a Wayland session
Let’s move now to installing Wayland and Plasma Wayland. To do this, run the following command.
pkcon install nx-desktop-wayland-legacy plasma-workspace-wayland
Then log out and select Plasma (Wayland) in the SDDM dropdown menu and log in.
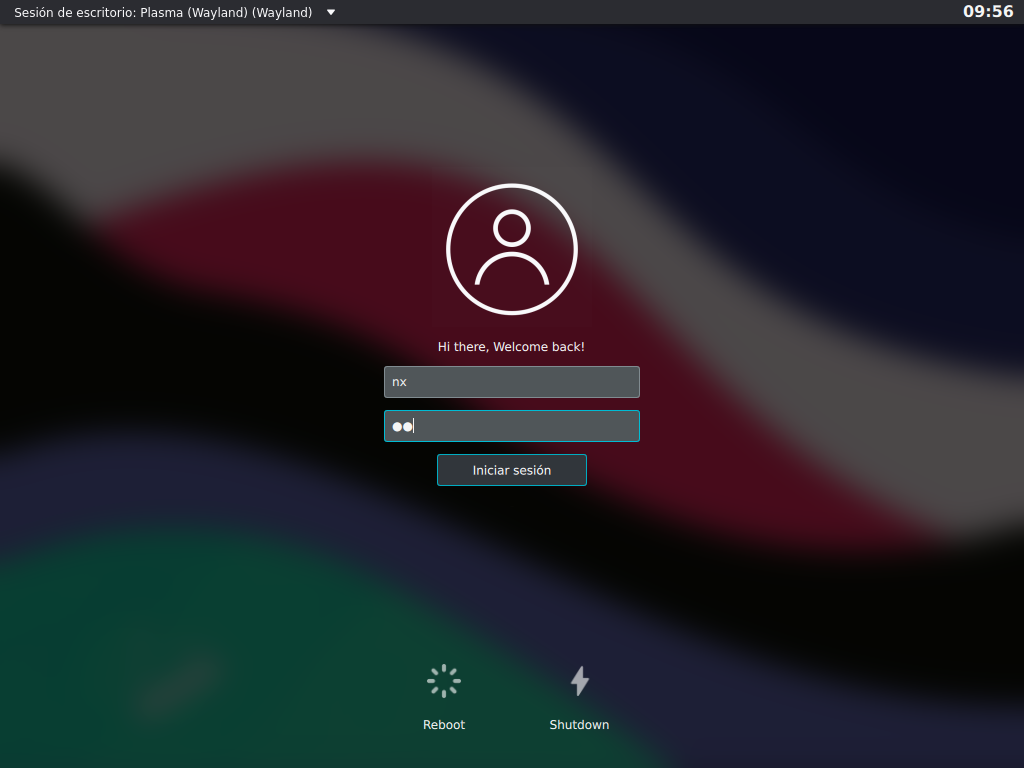
Plasma (Wayland) session in SDDM.
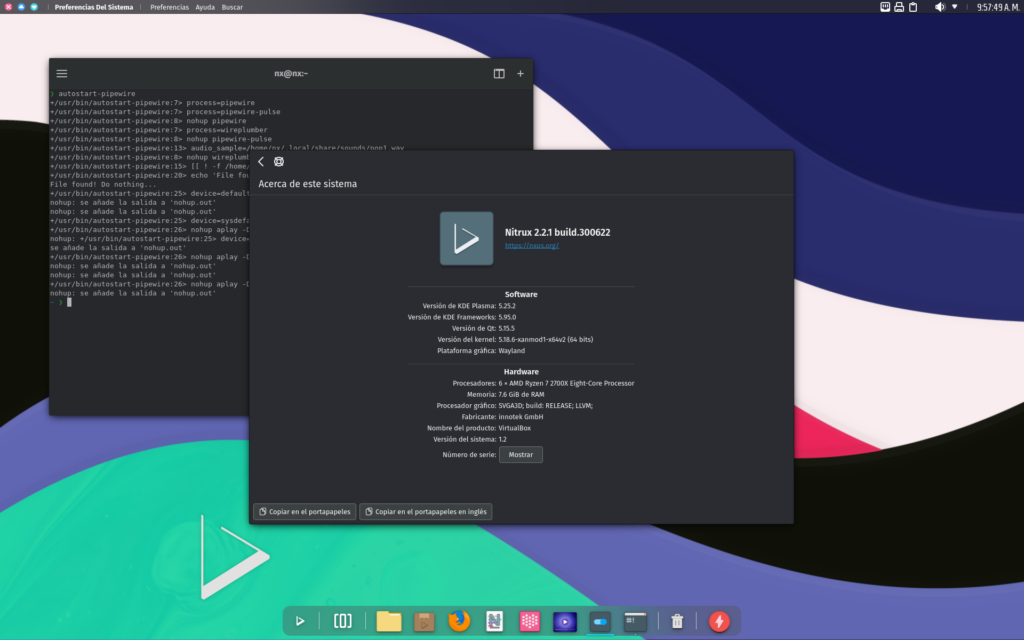
The script has trace enabled so we can debug problems; however, if you hear a sound, PipeWire is working under Wayland too.
That’s it; this concludes today’s tutorial.