The single best way to test Nitrux is to deploy it in real hardware, but maybe you don’t want to do that yet so your second best option is to use a virtual machine. In this article, we’ll explore how easy is to boot the Nitrux 1.1 ISO file in the most common hypervisors.
Oracle VirtualBox
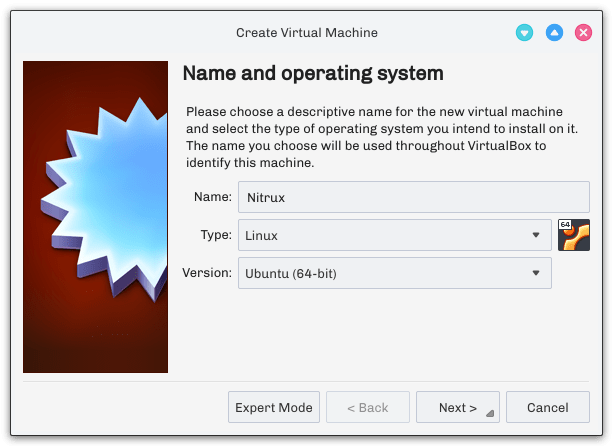
To use the ISO in VirtualBox all that you have to do is create a new virtual machine. Select Linux and Ubuntu (64-bit).
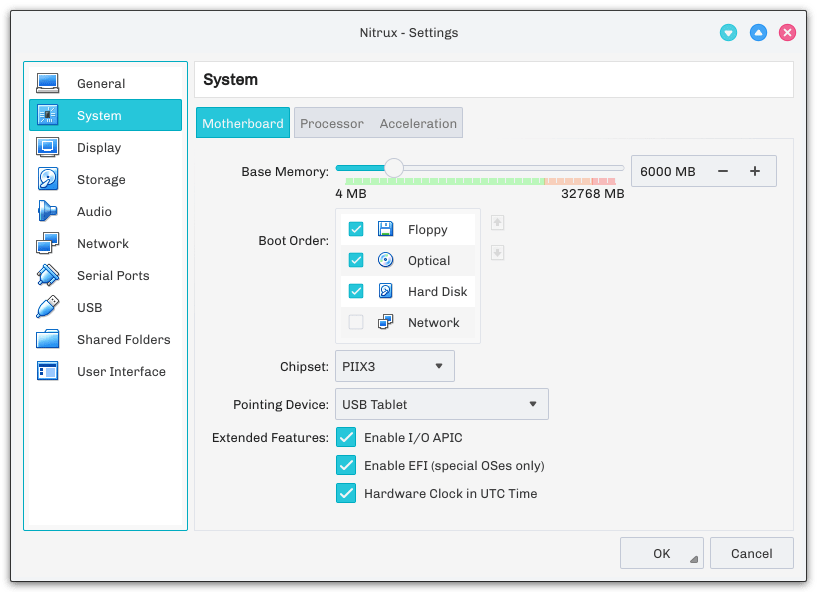
After you have customized the rest of the settings for your virtual machine to boot the ISO check Enable EFI (special OSes only) under System.
Now you can start your virtual machine using our ISO. The Linux kernel in Nitrux already includes most of the functionality that the VirtualBox Guest Additions add to the system, and as such, there’s no need for you to install them.
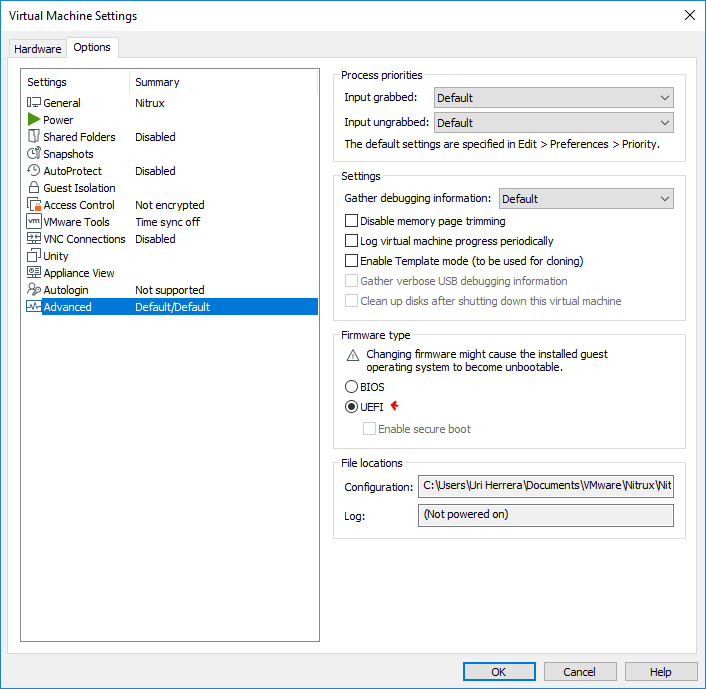
VMware Workstation Pro 15 and Workstation Player 15
To use the ISO in VMware Workstation all that you have to do is create a new virtual machine. Select Linux and Other Linux 4.x or later kernel 64-bit.
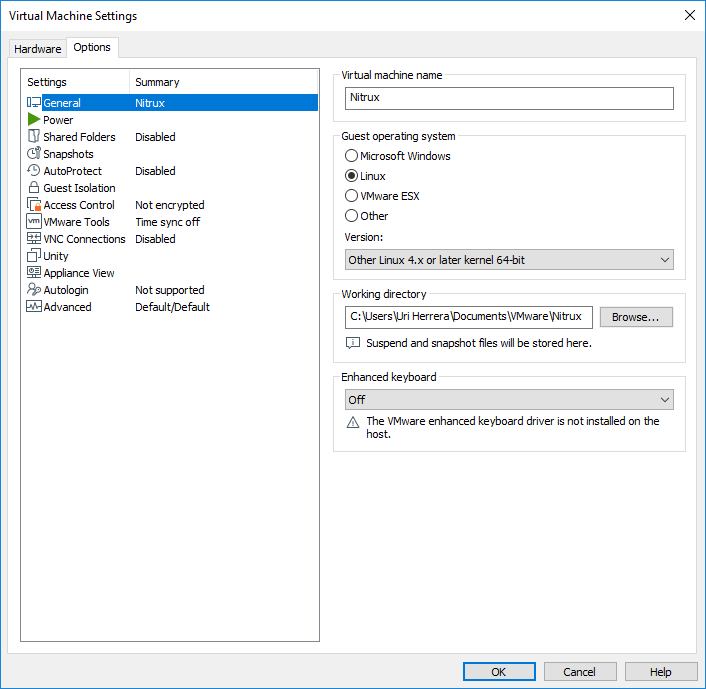
And just like with VirtualBox, enable EFI, in this case, it would be UEFI. Select the UEFI checkbox under Firmware type in the Options tab in the virtual machine settings.
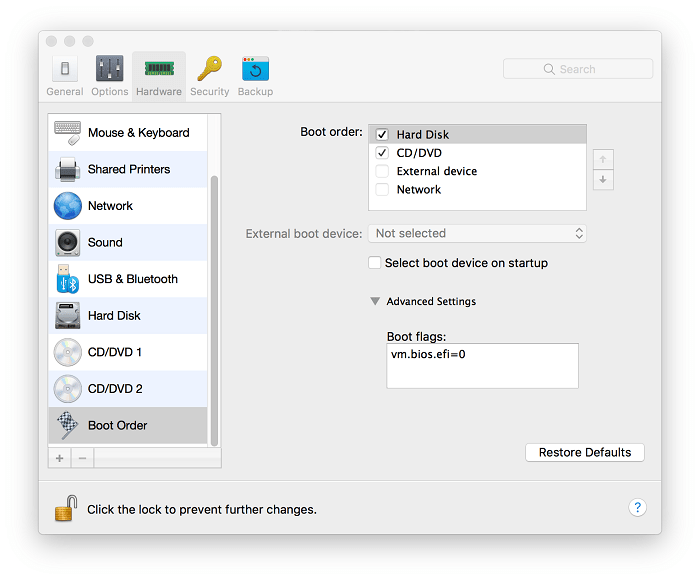
Parallels Desktop 13+
At present we do not have a Mac OS machine to try Parallels; however, a user has shared with us how to enable EFI boot in this software.
Following this article in the Parallels knowledge base, to enable EFI the boot flag must be set to vm.bios.efi=1 under Advanced Settings in the Boot Order category.
That sums it up pretty nicely. Remember that running Nitrux in a virtual environment is not reflective of the actual performance of the operating system. For better graphics performance switch from OpenGL to XRender in System Settings.
Our next release Nitrux 1.1.1 is coming on November the 30th, if you have deployed Nitrux, please check our article about updating using znx.